Nioh 3 Tonfa Build Guide: Best Stats, Skills, Armor, and Combos
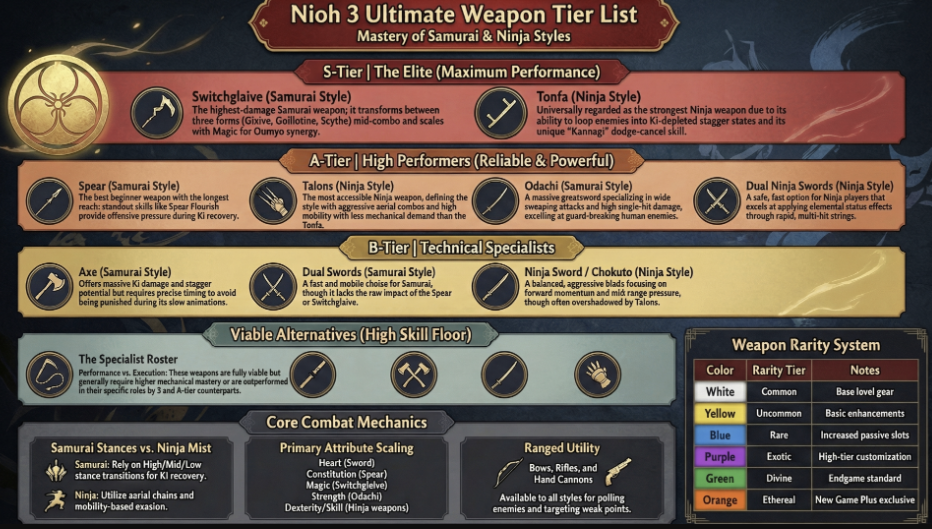
The Tonfa is the best Ninja weapon in Nioh 3, and it isn't particularly close. No other weapon in the entire game — Samurai or Ninja — drains enemy Ki as fast, chains into sustained multi-hit combos as efficiently, or punishes a staggered boss with the same relentless pressure. It holds the top spot in our Nioh 3 weapon tier list, sits at the core of countless endgame builds, and earns its S-tier position in every credible Nioh 3 best weapons ranking for a reason that becomes obvious the moment the build clicks: when an enemy's Ki bar hits zero and they collapse into a grapple window, the Tonfa put them there in roughly half the time any other weapon would have.


The Tonfa is the best Ninja weapon in Nioh 3, and it isn't particularly close. No other weapon in the entire game — Samurai or Ninja — drains enemy Ki as fast, chains into sustained multi-hit combos as efficiently, or punishes a staggered boss with the same relentless pressure. It holds the top spot in our Nioh 3 weapon tier list, sits at the core of countless endgame builds, and earns its S-tier position in every credible Nioh 3 best weapons ranking for a reason that becomes obvious the moment the build clicks: when an enemy's Ki bar hits zero and they collapse into a grapple window, the Tonfa put them there in roughly half the time any other weapon would have.
The tradeoff is range — or rather, the lack of it. The Tonfa is the most uncompromisingly close-range weapon in the game. It punishes any instinct to play at arm's length, demands that you stay inside striking distance through enemy combos, and requires mastering the Ninja style's evasion tools to survive that proximity reliably. Players who lean into that constraint and build around it unlock something the rest of the game struggles to match: a Ki-destruction loop so efficient that even Dream of the Nioh bosses spend more time staggered than they do attacking.
This guide covers the full Tonfa build from early game to the Underworld — stat allocation, every essential Martial Art and Ninjutsu tool, the best armor at each progression stage, Guardian Spirits and Soul Cores, the core combo rotation that defines the build, the critical defensive skills that make fighting at zero range survivable, and the mistakes that prevent players from accessing the weapon's real ceiling.
Why Play the Tonfa?
The Tonfa's identity is Ki destruction through sustained pressure. Where the Switchglaive earns its S-tier by combining stance-morphing reach with Onmyo magic scaling, the Tonfa earns its rating through a more direct mechanism: it hits faster and more repeatedly than anything else in the Ninja arsenal, and every one of those hits generates Ki damage. The weapon's light strikes cost minimal Ki per swing, which means you can maintain attack chains long enough to zero out an enemy's stamina bar before your own positioning becomes dangerous. Against human bosses who rely on Ki recovery to reset neutral, this is essentially a hard counter — keep attacking, keep draining, and the boss never gets a clean window to breathe.
The Tonfa also interacts unusually well with elemental status effects. Its high attack speed applies Water and Lightning element buildup faster than any other Ninja weapon, meaning you trigger Saturation and Electrified — the two statuses that amplify Ki damage and slow enemy movement respectively — in the opening seconds of a fight rather than after a long warmup. Once those statuses are active, the Tonfa's already-dominant Ki damage output gets a further multiplier, creating a feedback loop where faster status application leads to faster stagger, which leads to longer punish windows, which maintains pressure long enough for status to reapply before expiring.
The Demon Dance Martial Art is the mechanical key to the build's defensive survivability. It shortens the distance of your Mist dodge while extending invulnerability frames, allowing you to evade attacks while staying close enough to resume your combo immediately. In practical terms, Demon Dance lets you dodge through a boss's attack and land your next strike before their animation finishes — the Tonfa equivalent of a parry, but one that doesn't require stopping your offense to execute. Combined with Evil-Dispelling Evade and Evade Ninjutsu for Ki recovery, the Tonfa build stays mobile and aggressive in ways the game's other weapons can't replicate.
Tonfa Build Paths: Ki-Destruction vs. Elemental Status
The Tonfa supports two distinct build philosophies that share a core skill investment but diverge in stat priority and combat rhythm. Understanding which path suits your playstyle before allocating points is worth the time — the respec system makes course-correction easy, but both paths are more satisfying when built intentionally from the start.
The Ki-Destruction build treats the Tonfa as a pure stamina-draining weapon and keeps stat investment focused almost entirely on Constitution and Strength. Constitution is the primary stat because it simultaneously increases your HP and the Tonfa's melee attack — a dual-purpose efficiency that makes the build harder to kill while also hitting harder. Strength is your secondary, amplifying Ki damage directly. This path is the recommended starting point for new Tonfa players because it produces results immediately, doesn't require any understanding of elemental timing, and carries comfortably through the main story on Constitution alone. The ceiling is slightly lower than the elemental path in endgame content, but it gets there faster and is far more forgiving to execute.
The Elemental Status build layers Water and Lightning element application on top of the Ki-destruction foundation, targeting Saturation and Electrified simultaneously to trigger Confusion — the debuff that massively amplifies all incoming damage and cripples Ki recovery. The White Bone Spirit Tonfa's fixed Imbue Water effect is the cornerstone of this path: its native Water element triggers Saturation through normal attacks without any additional Talisman investment, freeing your Yin slots to add Lightning via Uncanny Bolt Ninjutsu or a Lightning Familiar. Once both statuses land, Confusion activates and the boss's health drops at a rate that makes the Ki-destruction build look measured by comparison. This path requires more setup and some understanding of status effect timing, making it the stronger endgame option for players willing to invest in it.
Tonfa Build Stats
Ki-Destruction Build — Stat Priority
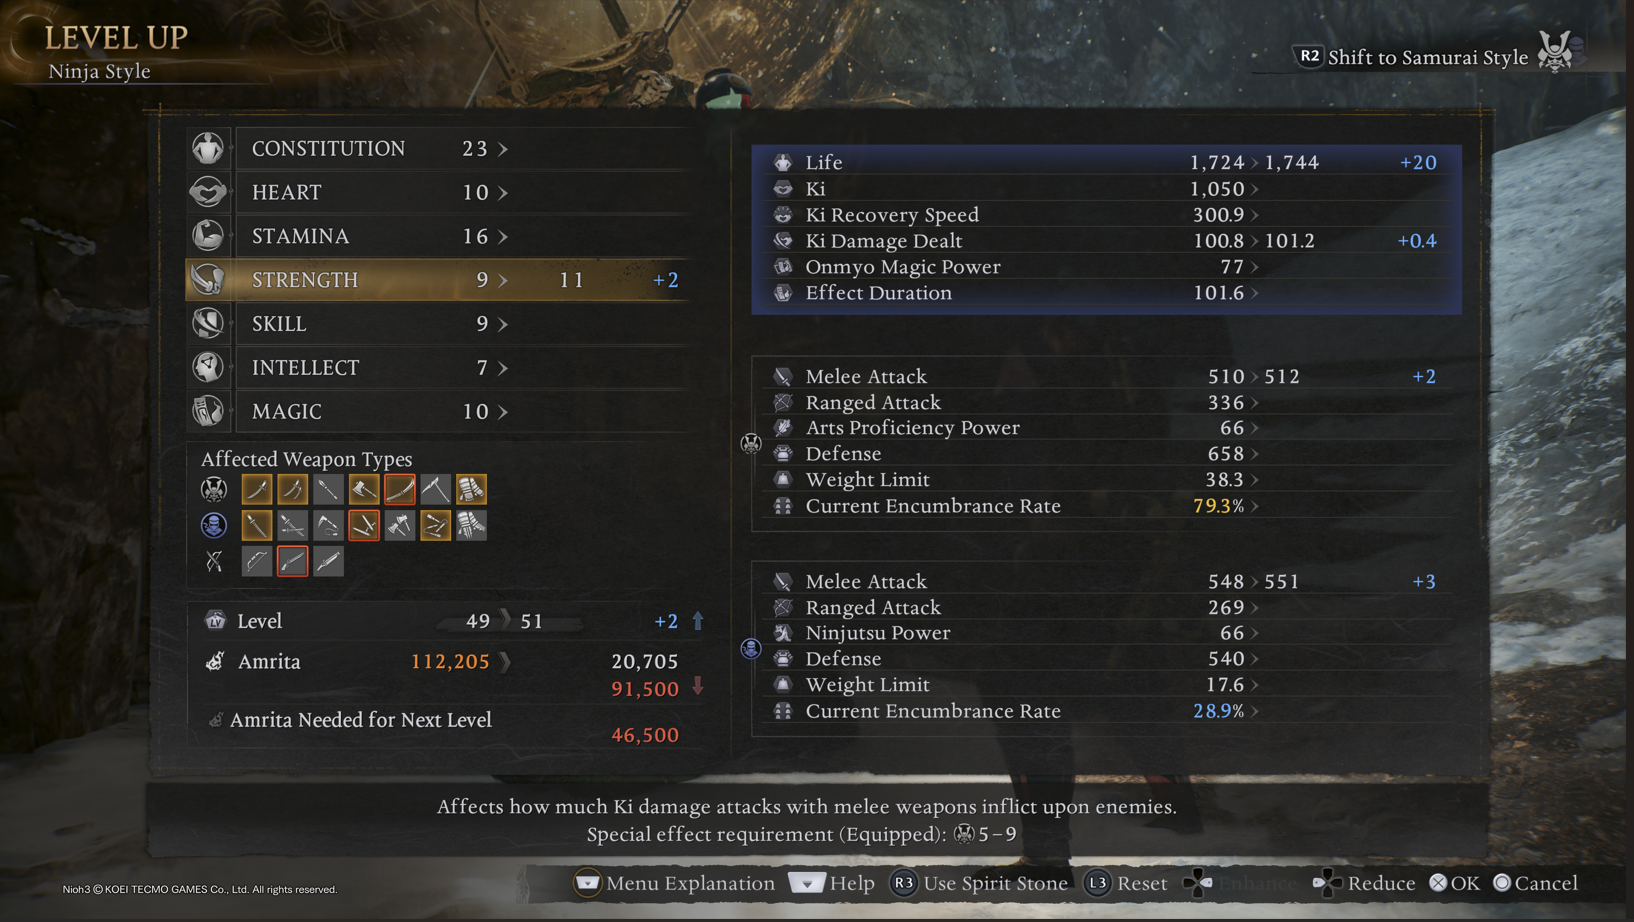
The Tonfa's three Reference Stats are Constitution, Strength, and Skill. Constitution is your primary investment across both build paths because it does double duty that no other stat in the game replicates for this weapon: it increases both your maximum HP and your melee attack simultaneously. For a weapon that requires you to fight at point-blank range through enemy combos, having your primary damage stat also be your primary survival stat is an efficiency advantage that shapes the entire build. Strength is your secondary, directly amplifying Ki damage — the Tonfa's defining combat function. Skill is your third investment, supporting Ninjutsu power (the strength of tools like Cicada Shell and Uncanny Bolt) and unlocking additional Yin Soul Core slots for Talisman capacity.
| Stat | Target (Mid-Game) | Target (Endgame) | Why |
|---|---|---|---|
| Constitution | 30 | 40 | Primary: HP + melee attack dual-scaling |
| Strength | 25 | 35 | Secondary: Ki damage amplification |
| Skill | 20 | 30 | Ninjutsu power + Yin slot capacity |
| Magic | 15 | 20 | Talisman access + additional Yin slots |
| Stamina | As needed | As needed | Equipment load for target armor weight |
| Heart | 10 | 15 | Baseline Ki pool; Constitution handles most recovery |
Elemental Status Build — Stat Priority
The elemental path uses the same Constitution and Strength foundation but adds meaningful Skill and Magic investment to power the status effect loop. Skill at 30 provides enough Ninjutsu capacity to carry both Uncanny Bolt charges and Cicada Shell charges through a full boss fight without running dry. Magic at 25 opens additional Yin slots and boosts Onmyo power — if you're running Water Familiar Talismans alongside Uncanny Bolt, higher Magic increases how much damage the Familiar deals per pulse and how long it persists before requiring a refresh. The trade-off is pulling points away from Strength, so this path deals slightly less raw Ki damage per hit in exchange for the Confusion multiplier when both statuses are active.
| Stat | Target (Mid-Game) | Target (Endgame) | Why |
|---|---|---|---|
| Constitution | 30 | 40 | Primary: HP + melee attack dual-scaling |
| Skill | 25 | 30 | Ninjutsu power, Yin slots, status buildup rate |
| Strength | 20 | 30 | Ki damage; lower priority than elemental path needs |
| Magic | 20 | 25 | Familiar power + additional Yin Talisman slots |
| Stamina | As needed | As needed | Equipment load management |
| Heart | 10 | 15 | Baseline Ki pool |
For both paths, keep Stamina high enough to stay within the light-to-medium armor equipment load range. The Tonfa's playstyle depends on fast, responsive dodges — moving into yellow or red Agility cuts the Ki cost efficiency of Demon Dance and Evade Ninjutsu that the entire defensive system is built around.
Best Tonfa Martial Arts and Ninjutsu Skills

Essential Ninja Style Skills (Unlock These First)
Before investing in Tonfa-specific skills, the Ninja style tree has a handful of unlocks that are prerequisites for making the weapon work at all. Evade is mandatory — it is the Ninja equivalent of the Samurai's Ki Pulse.
Evade is one of the best skill in Nioh 3 under Ninja Style
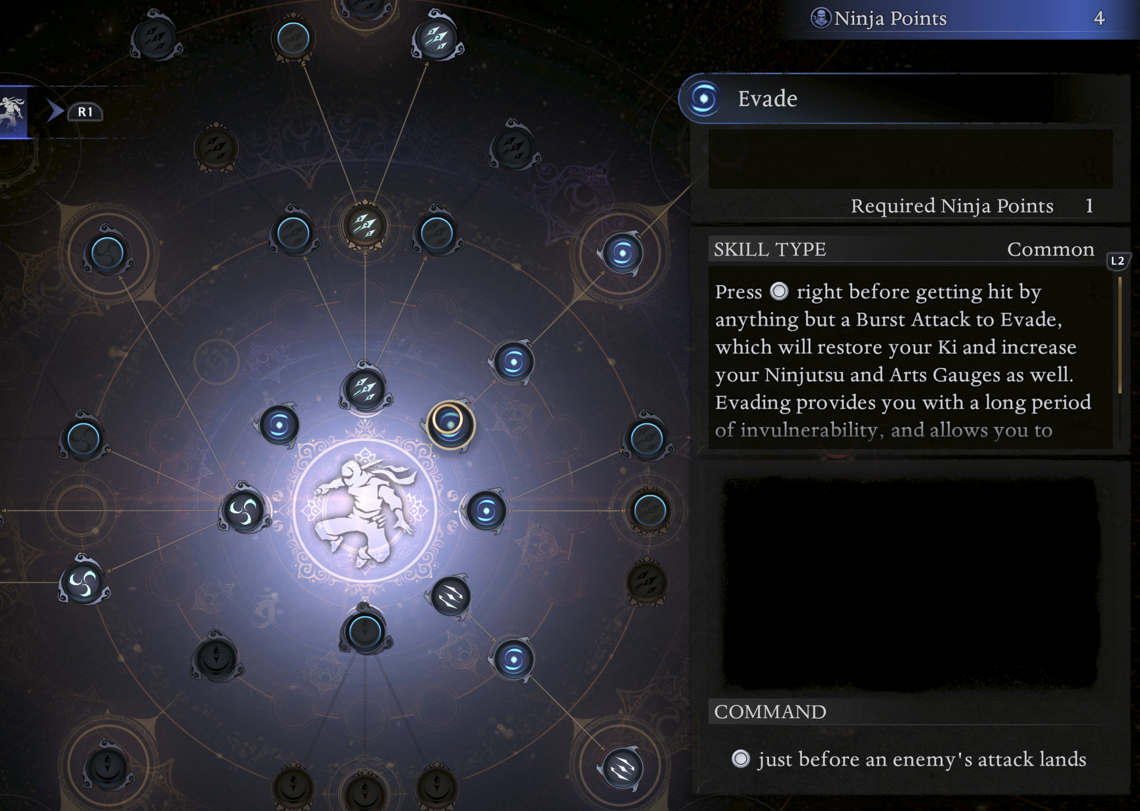
Unlocking Evade on its own lets you perform a dodge that refreshes your Ki when timed correctly. What makes it transformative is the synergy with two further unlocks: Evil-Dispelling Evade and Evade Ninjutsu. When both of these are active, a well-timed dodge clears the Yokai Realm from the area around you and triggers a Ki recovery pulse simultaneously. Together, these three skills replicate the Samurai's Ki Pulse system within the Ninja's evasion framework. Every serious Tonfa build in the community rates this skill trio as mandatory — unlock them as the first three investments before anything else.
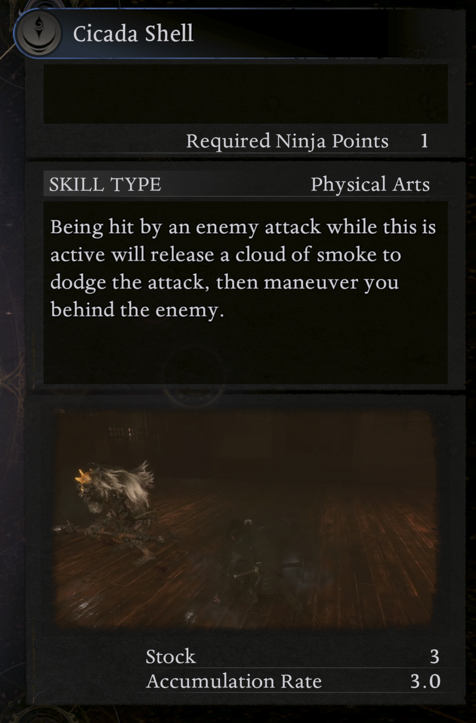
Cicada Shell is your primary panic tool and the defensive core of the close-range playstyle. It creates a decoy around your character that absorbs one hit, providing a safety valve for the moments when you misread a boss attack and take a hit you can't dodge. With the Tonfa requiring constant proximity to enemies, having one automatic hit absorption available at all times is not a luxury — it changes how aggressively you can play. Recharges at Shrines.
Mid-Air Dodge extends evasion options when airborne and is necessary for the Tonfa's aerial follow-up combos with Sacred Fire. Unlock it alongside Evade in the early Ninja tree.
In the general Secret Skills, Panacea Curefast (increases Elixir healing by 15%) and Armor Piercer (increases grapple and Final Blow damage by 10%) are both high-value early picks. Armor Piercer has direct synergy with the Tonfa's Ki-destruction loop: when you zero an enemy's Ki and trigger a grapple window, Armor Piercer amplifies the damage of the grapple itself, making the payoff for the entire Ki-drain chain meaningfully larger.
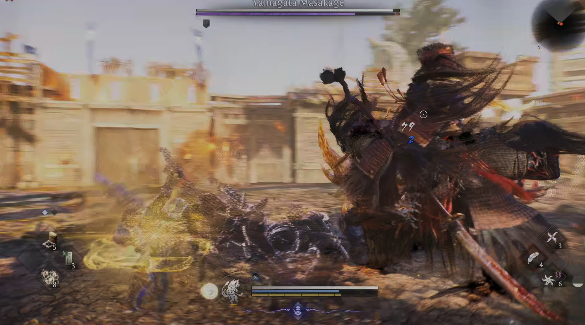
Priority Tonfa Martial Arts
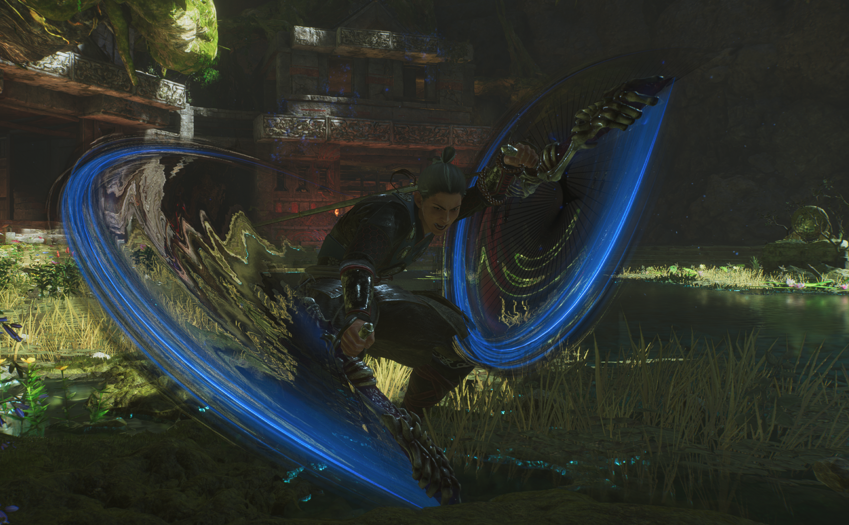
Spamming Demon Dance on Human enemy will break their KI in seconds
Demon Dance is the most important Tonfa Martial Art and the first thing you should unlock after the essential defensive skills. It redefines how you interact with enemy attacks: your Mist dodge becomes shorter in distance but dramatically longer in invulnerability frames, letting you dodge through attacks while staying inside striking range rather than retreating. The practical effect is that you stop playing defensively when a boss attacks — instead, you dodge through their swing, land a hit during their recovery, and resume your combo before they've finished their attack animation. Against human bosses with fast multi-hit combos, Demon Dance turns their offense into a series of grapple opportunities for your counter-hits. Kannagi, a passive unlock on the Demon Dance branch, extends this further by letting you cancel out of any Tonfa technique directly into Demon Dance — meaning even active skills can transition into the evasion mid-execution.
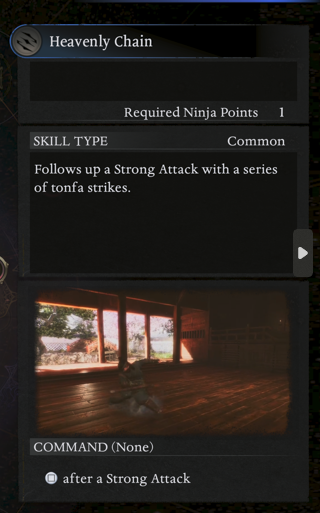
Heavenly Chain is your primary combo extender, chaining seamlessly from both Quick Attacks and Strong Attacks to continue sequences that would otherwise end. It keeps you attacking through windows where most weapons would require you to pause and reassess. Storm of Strikes is held from the Strong Attack input and rushes forward with a rapid multi-hit burst — this is the build's highest Ki-damage single activation and the closest the Tonfa comes to a finisher. Use it when an enemy is low on Ki and you want to force the winded state, or against stationary targets that have overextended. Sweeping Kick chains cleanly from basic attacks and serves as a secondary extender when Heavenly Chain is on cooldown.
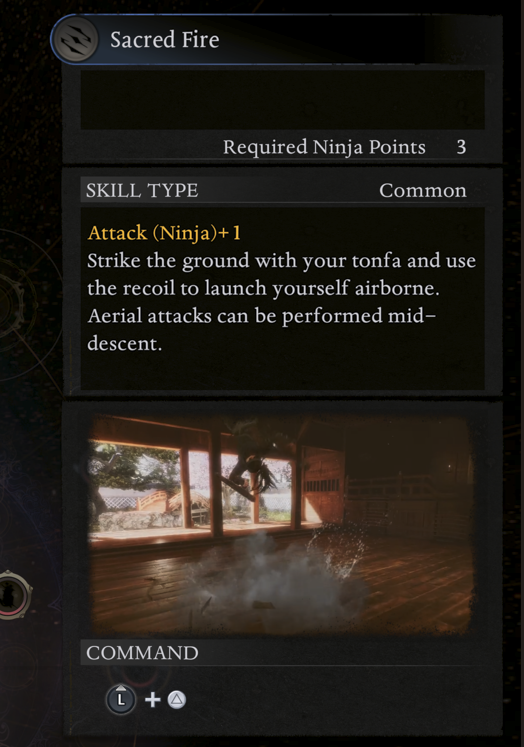
Sacred Fire is a gap-closer that launches you into the air before crashing down for a strong hit. At first glance it reads as a mobility tool, but its real value is repositioning during fights where the enemy has moved out of Tonfa range — Sacred Fire covers the gap in a single animation while dealing damage, resetting you to close range without burning a dodge. It also opens aerial follow-up options with Mid-Air Dodge for players exploring the Tonfa's aerial combo potential.
Pulverize requires Demon Dance as a prerequisite and is a powerful close-range finisher dealing strong damage particularly effective against human opponents who guard frequently. Since Demon Dance is already mandatory, Pulverize costs nothing additional in the prerequisite chain — it is essentially a free high-damage unlock once you have Demon Dance.
Mountain Breaker is a forward dash attack that covers distance while dealing AoE damage — primarily useful as an engagement opener against groups of enemies or when you need to close from mid-range without spending a dodge. Against bosses, it is less critical than Storm of Strikes or Heavenly Chain but useful as a repositioning tool that deals damage during the movement.
Apocalypse is a high-investment Martial Art that requires Sweeping Kick, Impenetrability, and completion of The Way of the Ninja: Veteran mission before it unlocks. The three-point Ninja cost makes it a mid-to-late game acquisition rather than an early priority. Once available, it functions as one of the Tonfa's hardest-hitting single activations — the payoff for the prerequisite chain is real, but it is not worth rushing at the expense of Demon Dance, Heavenly Chain, and Storm of Strikes.
Essential Ninjutsu Skills
The Tonfa's elemental effectiveness depends on Ninjutsu tools to apply secondary elements beyond what the White Bone Spirit Tonfa's native Water covers. Uncanny Bolt (requires Uncanny Flame as a prerequisite) applies Lightning damage to your attacks for the duration, enabling Electrified status buildup alongside Saturation for the Confusion trigger. For the elemental build, this is the primary damage-multiplying Ninjutsu skill. Uncanny Flame itself enables Fire buildup as an alternative or tertiary element if you're cycling for Confusion against water-resistant enemies. Run both in your Ninjutsu loadout and switch the active element based on what the enemy is vulnerable to.
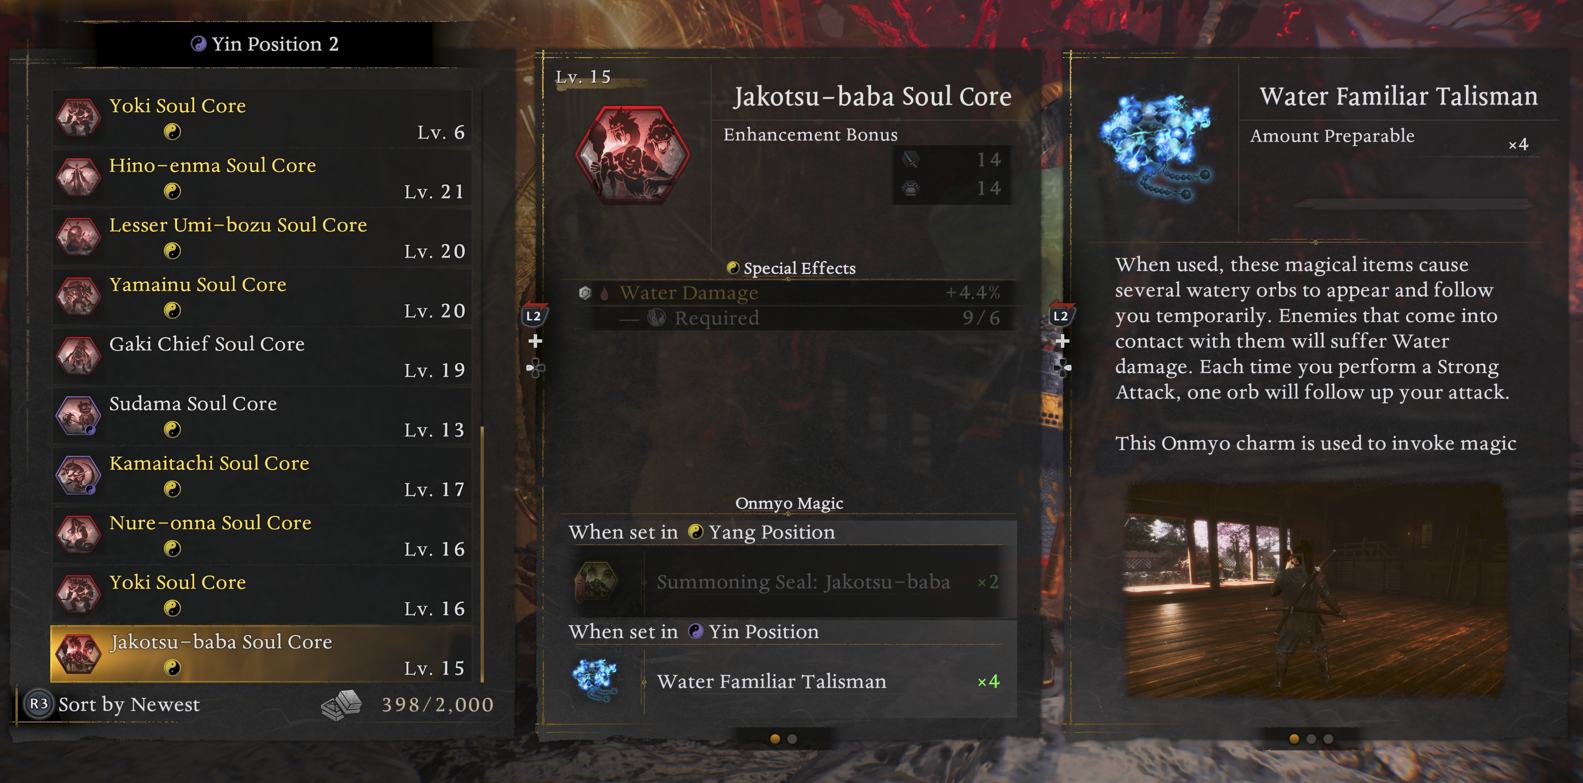
The Water Familiar Talisman (via the Jakotsu-baba Soul Core in Yin position) summons a Water damage orb that pulses additional Water element onto nearby enemies during your melee combos. For the elemental build, this is the secondary Water source when you want to accelerate Saturation buildup on bosses with higher element resistance. It runs alongside Imbue Water from the White Bone Spirit Tonfa rather than replacing it.
Core Combo Rotation
The Tonfa's fundamental combat loop is simpler in concept than the Switchglaive's three-stance chain but more responsive in execution — its power comes from reading enemy openings quickly and maintaining pressure rather than executing a fixed sequence. The baseline rotation against a grounded enemy: two or three Quick Attacks into Heavenly Chain to extend the combo window, followed by a Quick Attack into Storm of Strikes for the multi-hit Ki damage burst. After Storm of Strikes, execute a timed Evade for the Ki recovery pulse via Evade Ninjutsu, then immediately re-enter the next Quick Attack chain. This loop self-sustains because Evade recovers the Ki cost of Storm of Strikes before the next chain begins, enabling continuous offense without stopping to recover stamina.
Against bosses with clearly telegraphed attacks, incorporate Demon Dance on the dodge instead of a standard Evade. The extended invulnerability frames let you dodge through the attack, and Kannagi allows you to cancel out of whatever Tonfa technique you were mid-animation on and dodge simultaneously, meaning the dodge is essentially free in terms of combo interruption. Follow the Demon Dance with a Quick Attack the instant you return to the ground — the window between the boss's attack recovery and their next input is usually enough for two or three hits before the next dodge cycle.
Against human enemies who guard frequently, use Strong Attack to initiate instead of Quick Attacks. The Tonfa's Strong Attack applies Ki damage through guards in a way that quick strikes cannot, forcing the enemy to deplete their own Ki while defending. Alternate Strong Attacks with Heavenly Chain follow-ups and weave Storm of Strikes when their guard starts to crack. Pulverize is your finisher here — against fully guarding human enemies, Pulverize's damage penetrates blocking and deals enough Ki damage to force the winded state in a single activation when they're already low on stamina.
For aerial engagement: use Sacred Fire to close a gap and launch into the air, then follow with a Strong Attack slam on the descent for a high-damage Ki hit. Against larger Yokai that don't stagger easily, an aerial slam followed immediately by Storm of Strikes on landing deals the highest burst Ki damage the build can produce in a two-second window.
Best Weapons for Tonfa Builds
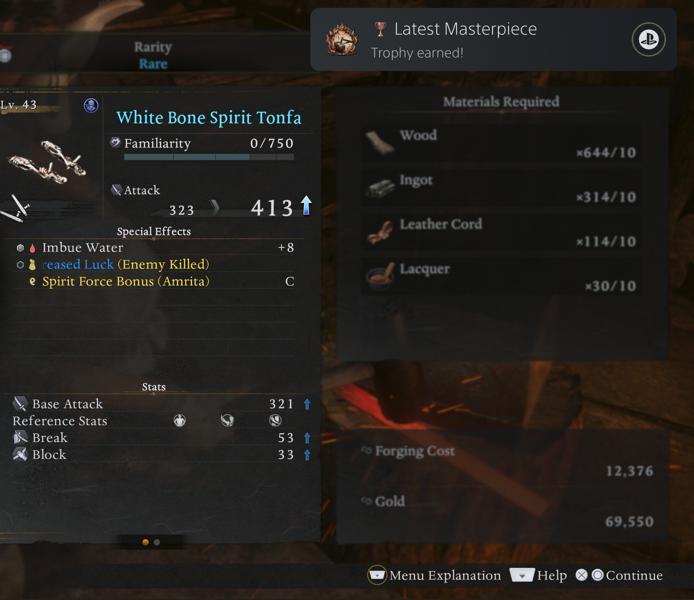
Primary Tonfa: White Bone Spirit Tonfa

The White Bone Spirit Tonfa is the build's signature weapon and the only specific item that matters for early-to-endgame Tonfa play. Its fixed special effect is Imbue Water — a permanent native Water element on every attack without requiring a Talisman slot. For the elemental build, this is the foundation that the entire status loop is built around: every hit in every combo applies Water buildup passively, which means Saturation triggers in the first few seconds of a fight against most enemies before you've used any Ninjutsu resources. Against bosses, Saturation is typically active before the first phase ends.
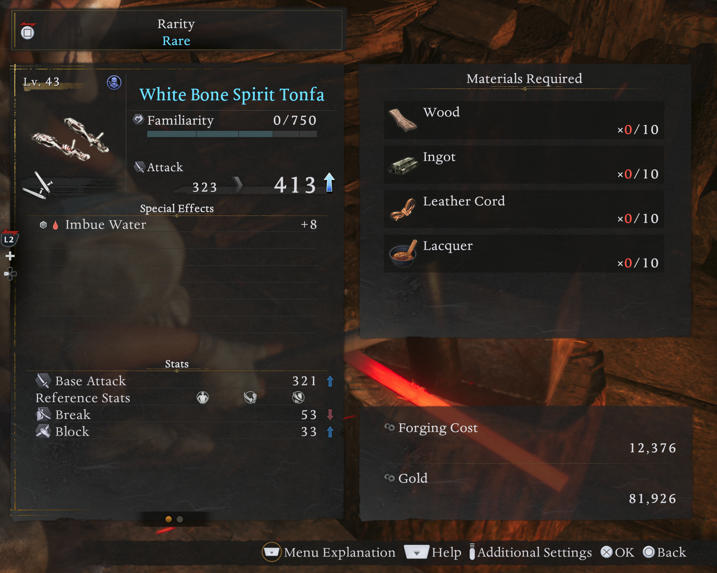
Crafting the White Bone Spirit Tonfa at the Fox-masked Blacksmith in the Eternal Rift costs ten each of Wood, Ingot, Leather Cord, and Lacquet — resources that are routinely available by the end of Act 1. There is no compelling reason to delay crafting it. Build your familiarity with the White Bone Spirit Tonfa consistently through normal play; maximum familiarity provides a significant damage multiplier that activates automatically without any additional investment.
For the Ki-destruction path without elemental focus, any Tonfa with Melee Ki Damage as a fixed or rolled effect is the equivalent priority. The Martial Artist's Tonfa has Melee Ki Damage +1.5% as its fixed effect, providing a reliable Ki damage baseline that amplifies every hit in the combo chain. Search for it at the Blacksmith once the smithing text is available or farm it from relevant enemies in mid-game missions.
What to Look for in Tonfa Special Effects
Beyond the White Bone Spirit Tonfa's fixed Imbue Water, the most impactful weapon affixes are Ki Damage vs. Saturated Enemy and Ki Damage vs. Electrified Enemy. Both activate reliably once your status loop is running and convert an already-high Ki damage number into something that depletes boss stamina bars in three or four combo chains. Melee Attack Ki Consumption Reduction on weapons extends how long you can maintain combo pressure before the stamina pool runs dry. Life Recovery (Amrita Absorption) and Increase Damage Dealt (Amrita Absorption) both trigger when you deal damage with Extraction Talismans active — the latter turns every hit into a small passive heal that, across a long combo chain, meaningfully reduces Elixir consumption in boss fights.
Secondary Weapon: Samurai Style
For your Samurai style loadout, Switchglaive is the natural pairing with Tonfa — as covered in depth in our Nioh 3 Switchglaive build guide. The Switchglaive shares Skill as a Reference Stat with the Tonfa's secondary scaling, meaning your Skill investment contributes to both weapons' damage simultaneously. More importantly, the two weapons complement each other at a mechanical level: use Ninja mode to run the Tonfa Ki-destruction loop and zero an enemy's stamina, then switch to Samurai mode to punish the resulting stagger window with a High Stance Switchglaive scythe combo. The style-switch punish is one of the highest-damage patterns in Nioh 3, and Tonfa + Switchglaive is the build combination that makes it most accessible because both style transitions are loaded with damage tools rather than transitioning from an offensive weapon to a utility one.
Personally, I used Odachi - it complement the speed of the Tonfa with the Slow and Powerful Ki break
The alternative Samurai pairing is Spear, which shares Heart as a secondary stat investment and provides a safer, more forgiving option for players still developing their Ninja mode positioning. Spear's longer reach and Spear Flourish skill cover the scenarios where Tonfa range is actively dangerous — against enemies that punish close approaches on first contact, open with Spear Flourish from Samurai mode to stagger them, then transition to Ninja mode Tonfa for the follow-up pressure chain.
Best Armor Sets for Tonfa Builds
Early Game: Heir's Shinobi Set (Acts 1–2)
The Heir's Shinobi Set is the best starting armor for any Ninja build, and Tonfa is no exception. Individual Heir's Shinobi pieces are light armor with a fixed Dodge Ki Consumption reduction effect — the most important early-game affix for the Tonfa because the build's entire defensive system runs through Mist dodges. Reducing the Ki cost of each dodge means you can weave more Evade recoveries and Demon Dance dodges into a fight without depleting your stamina pool mid-combo. Heir's Shinobi pieces are common drops in the early game and don't require specific farming targets. Collect and equip any pieces you find; their individual rarity matters less than having the Dodge Ki Consumption reduction active from the first few hours.
Supplement the Heir's Shinobi pieces with any light armor that carries Defense Bonus (Constitution) — since Constitution is your primary stat, this affix scales your armor's defensive value with your primary investment, making your protection stronger automatically as you level up rather than requiring armor upgrades to keep pace.
Mid-Game: Iga Jonin Set (Act 2 onward)
The Iga Jonin Set is the dedicated Ninja build armor in Nioh 3 and the target for all Tonfa builds from mid-game through Dream of the Samurai. It is light armor associated with the legendary Iga ninja leaders, and its set bonuses are designed specifically for Ninjutsu-heavy playstyles: the four-piece bonus provides Faster Movement (Ninjutsu Hit), giving you a brief speed burst whenever a Ninjutsu tool connects — including Uncanny Bolt, Cicada Shell activations, and Water Familiar pulses. The five-piece bonus adds Ninjutsu Damage amplification, Dodge Ki Consumption reduction, and a chance for Ninjutsu stock to remain unconsumed on use. That last effect is particularly impactful for Uncanny Bolt heavy play — roughly one in several activations replenishes itself rather than consuming a charge, extending your elemental coverage through a boss fight without requiring additional Ninjutsu investment.
Farming the Iga Jonin Set: pieces drop from enemies in Lake Sanaru and Futamata during the Warring States period. The smithing text drops from Hattori Hanzo by completing the Myth quest "The Demon's Regimen" in Hamamatsu. Once you have the smithing text, craft pieces at the Blacksmith rather than relying entirely on random drops — Constitution 9 is the only stat requirement to equip the full set, which you'll exceed naturally by mid-game. A five-piece Iga Jonin setup with one accessory piece for Ki Recovery Speed is the standard mid-game configuration before endgame Grace sets become available.
Endgame: Grace of Raijin / Grace of Susano (Dream of the Nioh)
In Dream of the Nioh, the endgame Grace sets replace the Iga Jonin as the optimal armor. For the elemental Tonfa build, Grace of Raijin provides Lightning damage bonuses that amplify Uncanny Bolt's Electrified application and boost the Ki damage multiplier against Electrified enemies — aligning with the build's dual-element Confusion loop in a way the Iga Jonin set cannot match. The set bonus at the higher piece counts provides a meaningful increase to elemental damage dealt, turning Confusion windows from fast kills into absurd kills.
For the Ki-destruction build, Grace of Susano is the alternative: it provides the highest raw melee damage scaling of any Grace set, amplifying every hit in the combo chain. Since the Ki-destruction build doesn't rely on elemental multipliers for its damage ceiling, Susano's raw offensive boost is more impactful than Raijin's elemental specialization.
As with all Grace sets, pieces only drop in Dream of the Nioh difficulty. Use five-piece Iga Jonin through Dream of the Samurai and begin Grace farming once you've cleared the first Dream of the Nioh missions. Set your Kodama Blessing to Sudama in regions aligned with your target Grace deity to bias Divine drops toward the correct set. Mix-and-matching the four-piece bonus from your primary Grace set with the two-piece bonus from a secondary set is a viable approach once you have enough Grace pieces to cover the main bonus tier — many endgame Tonfa builds run four pieces of their primary Grace alongside two pieces of Iga Jonin to retain the Ninjutsu capacity benefit while picking up the primary Grace's four-piece power spike.
Best Guardian Spirit for Tonfa Builds
Nekomata (Recommended — All Stages)
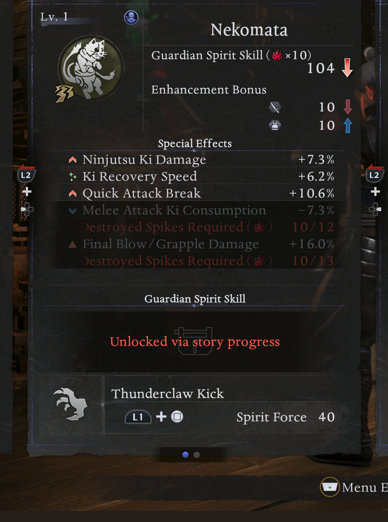
Nekomata is the best Guardian Spirit for Tonfa builds at every point in the game and the default recommendation for any player new to the weapon. Its passive effect suite is almost surgically tailored to the playstyle: it increases Ninjutsu Ki Damage (amplifying the damage component of your status-carrying Ninjutsu tools), raises Ki Recovery Speed (reducing the time between combo cycles), and lowers Quick Attack Ki Consumption. The last effect directly supports the Tonfa's reliance on long Quick Attack chains as the primary combo driver — lower Quick Attack Ki cost translates to more hits per stamina bar before you need to weave in an Evade recovery. Nekomata's Guardian Spirit Skill, Thunderclaw Kick, is a Lightning damage burst attack that serves as both a panic button to create distance from a dangerous enemy and an additional Lightning application for the elemental status loop. Nekomata unlocks after completing The Fall of Edo Castle quest, making it available before the mid-game.
Kurama Tengu (Mid-Game Offensive Alternative)
Kurama Tengu becomes available in the Heian period and is the specialist offensive alternative for builds that have mastered the defensive requirements and want to push damage output higher. It provides Martial Arts Ki Damage and Elemental Damage bonuses — both directly amplifying the Tonfa's main damage sources — and gives a Spirit Force Bonus whenever you use an Elixir, providing a brief attack window when you heal. Kurama's Guardian Spirit Skill, Slicer, launches a wind blade that deals Wind damage and Bluster accumulation; at close range it fires multiple blades, enabling rapid Bluster buildup that increases Ki damage dealt to Blustered enemies and compounding the Ki-destruction loop. Switch to Kurama Tengu once you're confident in Demon Dance timing and rarely need the defensive safety net Nekomata provides.
Kongojishi (Elemental Build Alternative)
For the elemental Confusion path specifically, Kongojishi is a strong alternative to Nekomata due to its Fire and Lightning element bonuses. Its passive provides Close Combat Damage amplification and Ki Recovery Speed — the second of which is universally valuable — while its Spirit Skill deploys a Lightning burst that serves as an additional Electrified application. Kongojishi enables aggressive cycling between Fire, Lightning, and Water elements, making triple-element Confusion setups more sustainable across long fights by ensuring your Lightning applications land reliably even against enemies that partially resist the element.
Note that your inactive Guardian Spirit — the one assigned to your Samurai style loadout — contributes 50% of its passive bonuses while you're in Ninja mode. Build your Samurai Spirit intentionally. Guhin, the recommended Samurai Guardian Spirit for Switchglaive builds, provides Martial Arts Ki Damage and Melee Damage vs. Winded Enemy passives that both benefit Tonfa play even when Guhin is in the inactive slot — making the Tonfa + Switchglaive pairing exceptionally efficient at dual-Spirit passive coverage.
Best Soul Cores for Tonfa Builds
The Tonfa's core loadout follows the same one damage core, one utility core, one passive core pattern that most optimized builds use. The specific selections here are chosen to amplify the Ki-destruction and elemental status loops that define the weapon.
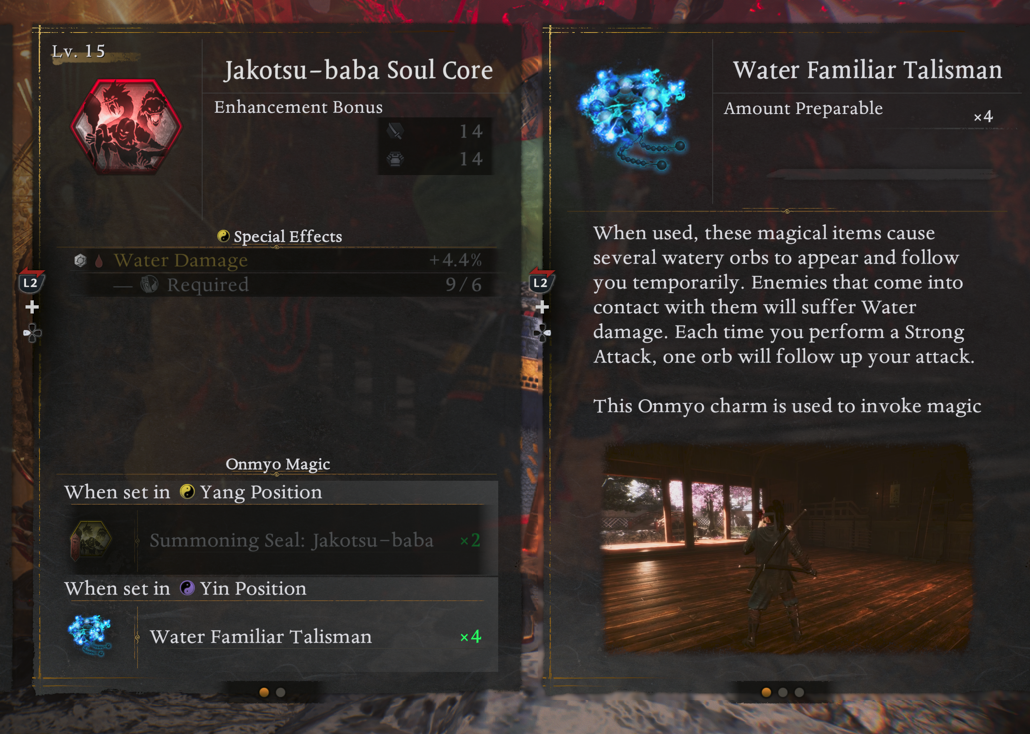
- Jakotsu-baba (Yin position) is the default early-to-mid game choice for elemental builds. Its Yin effect provides Water Familiar Talismans — orbs that pulse additional Water damage onto nearby enemies during your melee combos, accelerating Saturation buildup beyond what Imbue Water alone provides. For the Ki-destruction path without elemental focus, swap this for Gaki Chief (Yin), which provides Extraction Talismans that generate Amrita from enemies on each hit. Extraction Talisman synergizes with Life Recovery (Amrita Absorption) and Decrease Damage Taken (Amrita Absorption) gear affixes, effectively turning your high attack speed into passive healing and damage reduction simultaneously — the more hits per second you land, the more frequently both effects trigger.
- Yasha (Yang position) is the standard damage Soul Core for endgame Tonfa builds. In the Yang position it provides a Life Drain effect on Water damage and reduces Martial Arts Ki Consumption — the first passively heals you every time your Imbue Water triggers against a target, and the second directly reduces the stamina cost of Storm of Strikes and Pulverize. Upgrade Yasha through Soul Fusion as a priority; the Life Drain scales with rank and moves from a minor sustain bonus at Rank 1 to meaningful combat healing at Rank 7–9.
- Karasu Tengu (Yang position) is the alternative for builds running Kurama Tengu as their Guardian Spirit, since the two share a thematic Wind element focus. Karasu Tengu's Yang summon provides additional Ki damage to Blustered enemies — relevant if you're running Kurama's Slicer Wind skill to maintain Bluster — and its Yin position provides Wind Shot Talismans for ranged pressure during moments where closing the gap is dangerous. Choose between Yasha and Karasu Tengu based on whether your build is focused on Water/Lightning Confusion or Wind Bluster Ki-damage amplification.
For a third core slot, Nuppeppo (Yang) provides a summoned Yokai tank that draws aggro and creates free-swing windows. Alternatively, Otoroshi (Yin) provides Barrier Talismans for Ki Recovery Speed and Yokai Realm clearing — valuable in missions with heavy Yokai Realm density where the Evade Ninjutsu Ki recovery loop is disrupted by constant realm suppression.
Key Special Effects to Target on Gear
The most impactful affixes for Tonfa builds fall across three categories. Ki management affixes come first:
- Melee Attack Ki Consumption Reduction,
- Dodge Ki Consumption Reduction, and
- Ki Recovery Speed.
The Tonfa's playstyle demands both — long combo chains consume Ki quickly, and the Demon Dance / Evade recovery loop requires that dodge Ki costs stay low enough to not interrupt your offensive rhythm. A build with strong Ki management affixes can extend the three-part Quick Attack → Heavenly Chain → Storm of Strikes loop three or four times per engagement window; a build without them may complete it once.
Status effect affixes are second priority for the elemental path: Water Accumulation (Enemy) and Shock Accumulation (Enemy) on accessories increase the rate at which your hits build Saturation and Electrified respectively, reducing the number of hits needed to trigger both statuses. Ki Damage vs. Saturated Enemy and Ki Damage vs. Electrified Enemy on weapons amplify the Tonfa's already-dominant Ki damage output once both statuses are active — these two affixes together are responsible for a large portion of the build's endgame boss kill speed advantage over the Ki-destruction path.
Survivability affixes are the third category: Life Recovery (Amrita Absorption), Decrease Damage Taken (Amrita Absorption), and Auto Life Recovery (Evade). The Amrita Absorption pair synergizes with Extraction Talismans and Yasha's passive to make every attack sequence slightly self-healing. Auto Life Recovery (Evade) triggers a small HP recovery whenever you successfully dodge an attack — since the build executes several dodges per boss fight, this provides cumulative sustain that meaningfully reduces Elixir pressure over a long encounter. For armor in particular, Defense Bonus (Constitution) scales all defensive value with your primary stat, keeping your protection competitive without dedicated Stamina investment.
Tonfa Build Progression Roadmap
Early Game (Acts 1–2): Learn Demon Dance and Evil-Dispelling Evade
Your sole priority in the first two acts is understanding the defensive system. Invest Ninja points to unlock Evade, Evil-Dispelling Evade, and Evade Ninjutsu as your first three purchases — without these, Ki recovery while playing the Ninja style is slow and punishing. Immediately after, unlock Demon Dance. Equip whatever Tonfa the game provides with the highest level. Craft the White Bone Spirit Tonfa at the Fox-masked Blacksmith as soon as Eternal Rift access is available. Put Constitution to 20 and Strength to 15 as your first stat targets. Use Heir's Shinobi pieces for the Dodge Ki Consumption reduction. Run Nekomata as your Guardian Spirit from the moment it unlocks.
In actual combat, spend Act 1 and early Act 2 learning Demon Dance timing against regular enemies before relying on it against bosses. The extended invulnerability window is generous, but misjudging the input timing and dodging too early or too late in a boss combo is how the build's short range becomes fatal. Internalize the timing on common enemy attack animations, then carry that muscle memory into boss fights.
Mid-Game (Act 3 / Dream of the Samurai): Complete the Skill Suite and Farm Iga Jonin
Push Constitution to 30 and Strength to 25 entering Act 3. Unlock Heavenly Chain, Storm of Strikes, Sweeping Kick, Sacred Fire, and Pulverize in that priority order. Add Uncanny Bolt to your Ninjutsu loadout if you're pursuing the elemental path. Target Iga Jonin Set pieces through Lake Sanaru and Futamata, and farm Hanzo in the Eternal Rift for the smithing text if pieces aren't dropping naturally. Equip Jakotsu-baba in Yin and Yasha in Yang as your Soul Core configuration once both are available. Begin looking for Ki Damage vs. Saturated Enemy and Ki Damage vs. Electrified Enemy on accessories — even low-value rolls of these affixes provide measurable improvements against the bosses in this stage.
By Dream of the Samurai, the full combo rotation should be running consistently and Demon Dance should feel intuitive against standard boss patterns. Start to deliberately practice the Saturation → Electrified → Confusion loop on mid-game bosses even if the damage multiplier isn't dramatic at this difficulty — building the habit of managing both status applications simultaneously makes the Dream of the Nioh transition significantly smoother.
Endgame (Dream of the Nioh / Underworld): Confusion Loop and Grace Farming
Push Constitution to 40 and begin investing in your secondary stats based on your chosen path. Target Grace of Raijin or Grace of Susano pieces in Dream of the Nioh missions, using Kodama Blessing set to Sudama in aligned regions for biased drop rates. Once you have four Grace pieces, transition away from Iga Jonin on those slots while keeping a two-piece Iga Jonin bonus if the Ninjutsu capacity benefit remains useful for your charge management.
In the Underworld and the deepest Dream of the Nioh content, buff uptime is everything. Pre-fight routine: deploy Jakotsu-baba Water Familiar before engagement, activate Uncanny Bolt, enter combat and begin building Saturation immediately with Quick Attack chains through the White Bone Spirit Tonfa. Keep Demon Dance reflexes sharp — at this difficulty level, most boss attacks will kill you in one or two hits regardless of Constitution, making precise dodge timing the primary survival mechanism rather than HP investment. When Confusion activates, switch to Storm of Strikes and Pulverize for the burst window before the statuses expire and the reapplication cycle begins again.
Common Tonfa Mistakes to Avoid
The most common mistake new Tonfa players make is treating it like a safe-distance weapon. When players instinctively retreat from boss attacks instead of committing to Demon Dance, they remove the invulnerability-frame advantage that makes the short range viable. Retreating from attacks with a standard dodge moves you out of the Tonfa's effective range and requires extra movement to re-close the gap, costing two or three combo hits and potentially breaking the Ki-depletion momentum that the build is building toward. If you're frequently out of range after enemy attacks, the answer is more Demon Dance practice — not adjusting your positioning to fight at longer range.
The second common mistake is unlocking Demon Dance but not unlocking Kannagi alongside it. Kannagi allows you to cancel directly from any Tonfa technique into Demon Dance without finishing the animation first. Without Kannagi, there are gaps in your offense where you can't dodge because you're committed to a Martial Art's animation. With Kannagi, every attack in your combo chain has a clean Demon Dance cancel available on any frame. These two skills function as a single system and should be treated as one unlock.
Third: neglecting Evil-Dispelling Evade and Evade Ninjutsu. The Tonfa is a high Ki consumption weapon when running Storm of Strikes repeatedly. Without the Evade-based Ki recovery system functioning, the build runs dry in the middle of boss fights — a death sentence at short range. Some players unlock Demon Dance early and assume the build's defensive system is complete, but Demon Dance addresses survivability, not Ki management. Evil-Dispelling Evade and Evade Ninjutsu address Ki management. Both systems are necessary.
Fourth: ignoring the White Bone Spirit Tonfa in favour of higher-level drops. The White Bone Spirit Tonfa's fixed Imbue Water effect is not replaceable by any rolled affix at the same point in the game. A higher-level Tonfa with generic affixes will have more raw attack but no elemental application, meaning you lose Saturation entirely and with it the Ki Damage vs. Saturated Enemy multiplier on every hit. Upgrade and keep using the White Bone Spirit Tonfa through mid-game; its elemental value outweighs a level or two of base attack difference until Divine rarity elemental alternatives start dropping in Dream of the Nioh.
Tonfa Build Summary
The Nioh 3 Tonfa build is the best entry point into serious Ninja play and, for experienced players, one of the two or three strongest builds in the entire game. It demands proximity, punishes passive play, and requires genuine investment in Demon Dance and the Evade-based Ki recovery system before its defensive viability is established. Once those foundations are in place — and it takes less time than the Switchglaive's three-stance mastery requirement — the Tonfa's Ki-destruction loop runs with a consistency and speed that no other weapon in the game can match against bosses that rely on Ki recovery to control neutral. The elemental Confusion path available to the White Bone Spirit Tonfa then pushes that ceiling into Dream of the Nioh territory where the build competes directly with the Switchglaive Onmyo hybrid for the fastest boss kill times in the game.
For how the Tonfa ranks against the other thirteen weapons in Nioh 3, see our complete Nioh 3 weapon tier list. For the full breakdown of every Ninja and Samurai weapon including the Switchglaive, Talons, Dual Ninja Swords, and all seven Samurai options, see our Nioh 3 best weapons guide.
Câu hỏi thường gặp về Nioh 3
- Ngày phát hành Nioh 3 là khi nào?
- Nioh 3 dự kiến phát hành vào ngày 6/2/2026.
- Nioh 3 chơi được trên nền tảng nào?
- Nioh 3 hỗ trợ: PC (Microsoft Windows), PlayStation 5.
- Nioh 3 thuộc thể loại gì?
- Nioh 3 thuộc thể loại: Role-playing (RPG), Hack and slash/Beat 'em up, Adventure.
- Có trailer chính thức của Nioh 3 không?
- Có. Bạn có thể xem trailer của Nioh 3 ngay trên trang này ở phần video.
Khám phá thêm
Nioh 3 Tonfa Build Guide: Best Endgame Setup for Dream of the Nioh
The Tonfa is Nioh 3's highest Ki-damage Ninja weapon — a blunt, fast, relentless close-range weapon that wins by draining enemy stamina bars faster than they can recover, forcing Winded states, and capitalising on those vulnerability windows with finishing moves that deal disproportionate burst damage. In the base game, a halfway-decent Tonfa setup will stagger-lock most enemies before they can threaten you. In Dream of the Nioh — where enemy health pools triple, their damage can one-shot you, and your basic combat tools stop being enough — the Tonfa build stops being about hitting hard and starts being about engineering a system.
Nioh 3 Weapons Scaling Guide: Which Stats to Level for Each Weapon
Nioh 3 throws out the letter-grade scaling system from Dark Souls and Elden Ring entirely. There are no A/B/C rankings stamped on your weapon telling you to just pump Strength. Instead, every weapon in the game operates on what Team Ninja calls Reference Stats — a three-stat dynamic scaling system that automatically adjusts to your highest attribute investment. It sounds complex. It is, slightly. But once you understand how it works, it becomes one of the most build-friendly systems in any Souls-adjacent game, because it's nearly impossible to permanently brick your character — and respec is free.
Nioh 3 Best Samurai Weapons: Top Picks for Every Samurai Build
This guide ranks all seven Samurai weapons, breaks down what each one actually rewards in combat, identifies the best Martial Arts for each, and matches each weapon to the build identity where it performs best. If you're deciding which Samurai weapon to commit to — or you've been struggling with your current pick and want to know why — this is the reference you need.
Nioh 3 Character Creation Guide: Best Character Codes, Sliders & Tips (PS5 & PC)
Before a single Yokai dies, before you settle on your first weapon, before you even decide whether you're building Samurai or Ninja — you'll be staring at the Nioh 3 character creation screen deciding what your warrior actually looks like. And given that Team Ninja has built one of the most detailed character customization systems in the Souls-like genre, that time investment is entirely justified. Whether you want to craft an original face from scratch or import one of the community's best Nioh 3 character codes to get straight into the action, this guide covers everything: every menu, all the working codes for both PS5 and PC, and tips for getting the most out of the system.