
Path of Exile 2 Monk Leveling Guide: Updated for Patch 0.5 Return of the Ancients
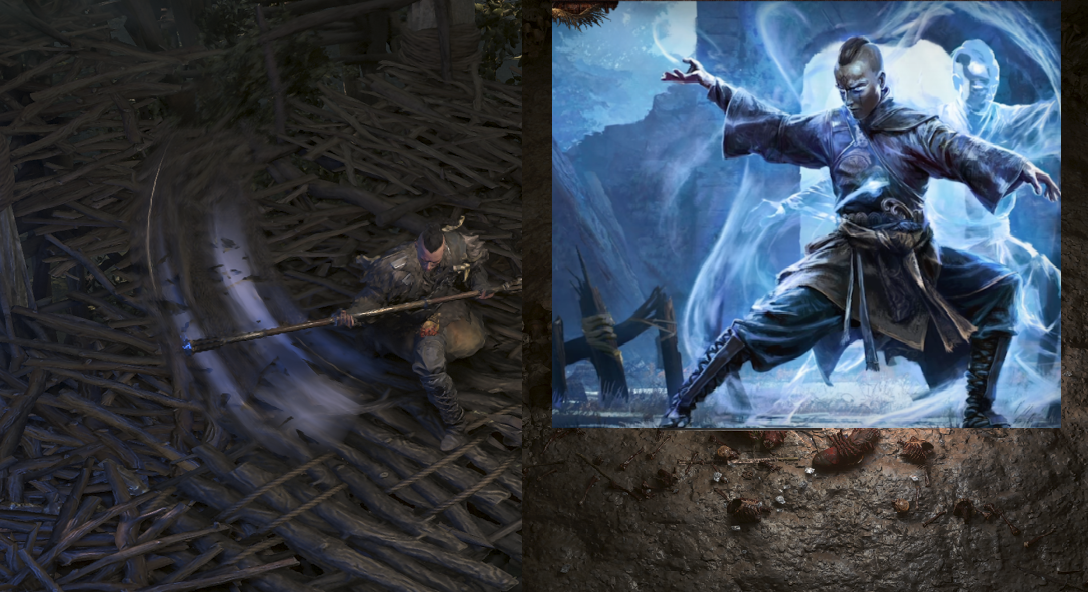
Patch 0.5 transformed Monk leveling into one of the smoothest experiences in Path of Exile 2. This comprehensive guide covers skill gem priorities, Hollow Palm timing, the new Martial Artist ascendancy, and boss tactics to get you through the campaign efficiently.


Path of Exile 2 Monk Leveling Guide: Updated for Patch 0.5 Return of the Ancients
The Monk in Path of Exile 2 just got a serious injection of new life with Patch 0.5 Return of the Ancients, which launched on May 29, 2026. If you've been hesitant about picking up the Monk class — or you tried it before and found early leveling clunky — this is the moment to reconsider. The patch didn't just tweak numbers; it fundamentally reshaped how Monks progress through the campaign, introduced the entirely new Martial Artist ascendancy, and created multiple viable pathways from Act 1 all the way to endgame. This guide breaks down the most effective leveling strategies, skill gem priorities, and gear decisions that'll get you through the campaign efficiently and set you up for serious map progression.
Why Monk Leveling Changed in 0.5
Before 0.5, Monk leveling felt fragmented. You'd struggle through Acts 1-2 with awkward skill combinations, waiting for key gems to come online. Power Charge generation was inconsistent. Weapon upgrades felt mandatory. The experience was less "smooth progression" and more "survive until the good skills unlock."
Patch 0.5 fixed this. The Martial Artist ascendancy arrived with completely new mechanics around bell generation, spectral illusions, and glove transformation through Way of the Stonefist. The existing Invoker and Acolyte of Chayula ascendancies received buffs. Most importantly, the early-game skill gem pool got reworked, and support gems now come online at more reasonable intervals. Hollow Palm Technique, which was already powerful, got ancestral boost compatibility in 0.5, meaning your bells now trigger on three nearby enemies instead of just one.
The result? Monk is now one of the smoothest league starts in the game. If you gear correctly and follow the progression paths outlined here, you'll feel strong from Act 1 and genuinely powerful by Act 3.
Act 1 Leveling: Glacial Cascade Foundation
Your Act 1 strategy depends on which ascendancy you're committing to, but the core early-game skills remain consistent across all three Monk variants. You're going to spend a lot of time with Glacial Cascade,
Glacial Cascade: The Universal Monk Leveling Skill in 0.5
Here's the thing about Glacial Cascade — it's not the flashiest option, it's not the fastest, and the community will happily tell you that Wyvern/Falling Thunder has wider clear. They're not wrong. But Glacial Cascade is the skill that works for every Monk ascendancy path without demanding you juggle five buttons.
But this skill's value isn't in the base stats. It's in the Payoff tag and what that final spike does.
What the Skill Actually Does
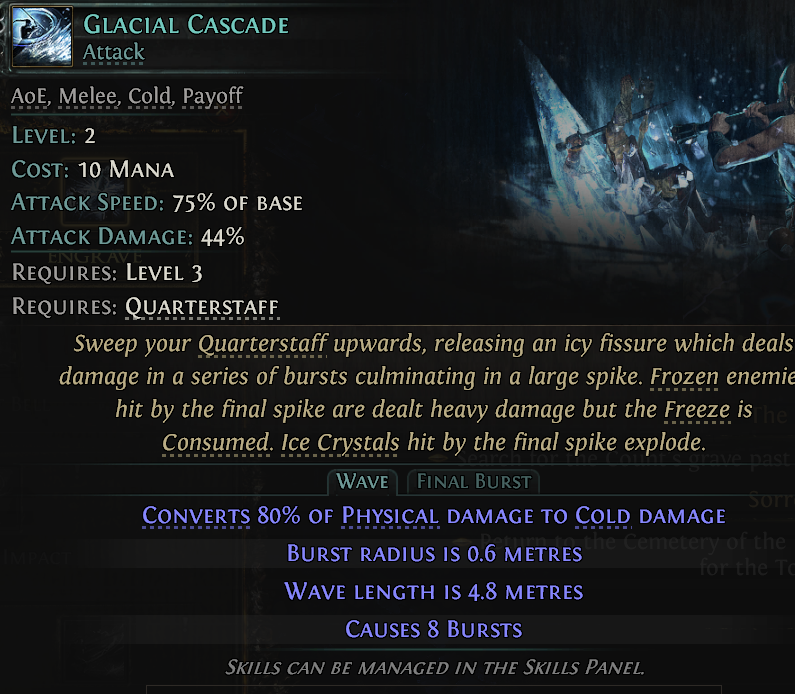
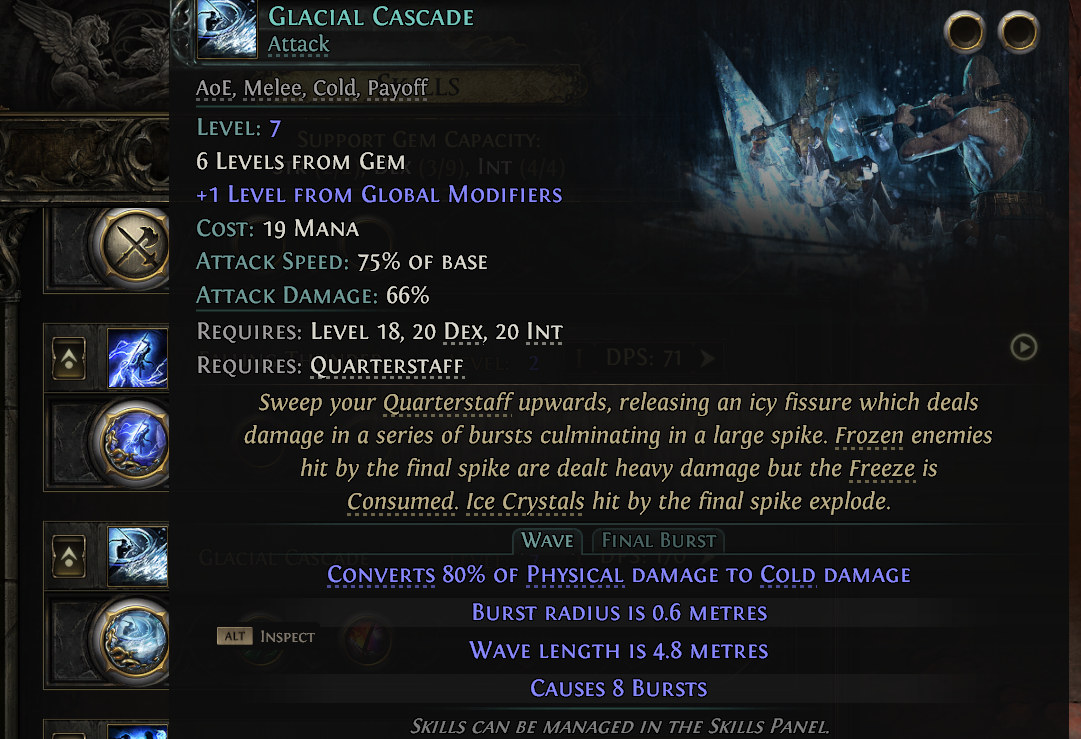
Glacial Cascade sweeps your Quarterstaff upward, releasing an icy fissure that deals damage in a series of bursts — 8 of them, each with a 0.6 metre burst radius — across a 4.8 metre wave length. The Wave phase converts 80% of Physical damage to Cold damage. Then the Final Burst hits. Frozen enemies struck by that final spike take heavy damage and have their Freeze consumed. Ice Crystals caught by the final spike explode.
That's the combo. Freeze something, position the final spike on it, collect the damage. Simple execution loop that doesn't change whether you're heading into Martial Artist, Invoker, or Acolyte.
Why Every Monk Ascendancy Can Use This
The community consensus in 0.5 is split between the ice setup and the physical/Wind Blast route. The physical route genuinely does pull ahead in Act 2 and 3 for clear width — no argument there. But it comes with real mechanical overhead. You're managing stun thresholds, priming for Wing Blast, worrying about whether your staff is too well-rolled and breaking the stun threshold on bosses. One community player described the early Wyvern run as "dreadfuckingful" through the first half of Act 1. That's not hyperbole.
Glacial Cascade doesn't ask that much of you. Frozen Locus, Cascade, Pounce, Frost Bomb. That's the rotation. The inputs stay consistent regardless of your ascendancy destination.
- Martial Artist: Transitions naturally into the physical/stun setup post-ascendancy, but uses Glacial Cascade to get there without the early-game headaches.
- Invoker: Cold conversion synergises directly with Invoker's elemental focus. The 80% Physical to Cold conversion on the Wave means you're already building toward Ice Strike and freeze-stacking from the moment you equip the skill.
- Acolyte: Less direct synergy, but the reliable freeze application and the low-complexity rotation free up mental bandwidth for managing Acolyte's more demanding mechanics.
Frozen Locus: Glacial Cascade's Best Friend
Your next priority is Frozen Locus, which you'll get from a camp in Clearfell. This skill places a frozen crystal that you can detonate with Glacial Cascade for burst damage. Together, Glacial Cascade and Frozen Locus create a ranged, safe playstyle that keeps you away from the worst of enemy damage early on.
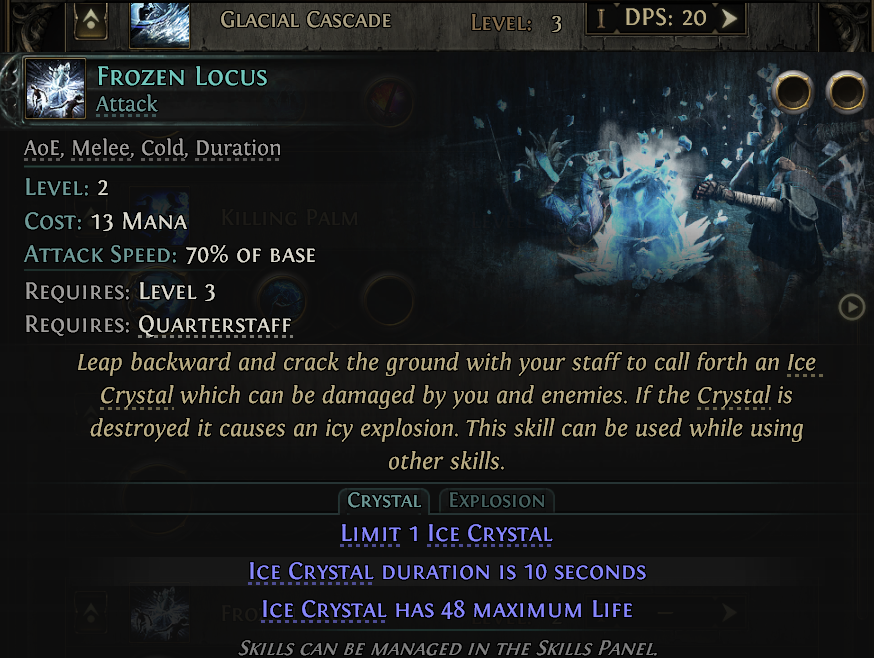
At Level 2, costing 13 Mana, Frozen Locus does something deceptively powerful for a leveling skill — it places an Ice Crystal that you can detonate. Slam it down with Frozen Locus, then let Glacial Cascade's columns chew through the crystal. The resulting icy explosion hits everything nearby. Free AoE damage on top of your main skill's damage.
The crystal has 48 maximum Life and lasts 10 seconds. That's a generous window to proc the explosion mid-pack.
The real kicker? This skill can be used while using other skills. No animation lock. Drop the crystal, keep casting Glacial Cascade without interruption — the combo flows naturally rather than forcing you to stop and commit.
Simple. Effective. Exactly what early campaign leveling needs.
For your first Tier II Uncut Skill Gem (around level 6), grab Pounce if you want mobility, or upgrade Glacial Cascade if you want raw damage. Most guides recommend upgrading Glacial Cascade at this stage — you're not in danger yet, and the damage boost carries you harder than an extra mobility tool. By level 8, cut Frost Bomb, which applies Cold Exposure to enemies (lowering their cold resistance by 25%). This is a massive damage multiplier for your other cold skills.
Rapid Attacks I: The First Support You Socket
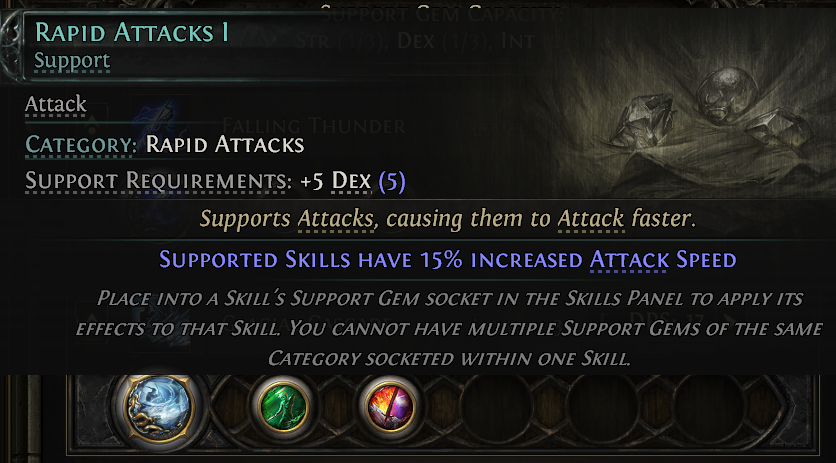
Glacial Cascade attacks at 75% of base Attack Speed — it's a slow skill by design. That's exactly why Rapid Attacks I is the first support you slot in. The 15% increased Attack Speed directly counteracts this penalty, letting you pump out bursts faster and freeze more consistently. More attacks means more freeze buildup, and more freeze means more Consume procs. The entire damage loop accelerates.
Only costs +5 Dex to equip. You almost certainly meet that requirement already.
Support gems matter here. Your first support gem should be Rapid Attacks I on Glacial Cascade — faster casting means more shards, more detonations, more damage. Your second support gem is Rage I, also on Glacial Cascade, which increases damage as you build Rage stacks. Elemental Armament I goes on Frozen Locus for extra elemental damage.
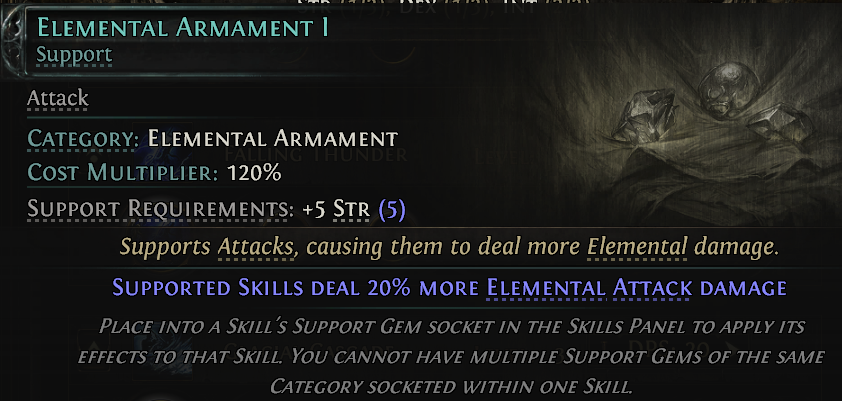
This setup carries you through Act 1 and into Act 2 without requiring weapons to be perfect. A decent quarterstaff with physical damage helps, but even a mediocre one works if your skill gems are upgraded.
Your First Spirit Gem
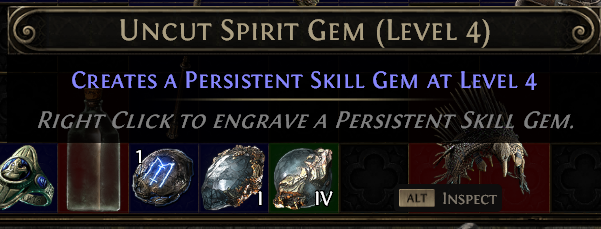
At Level 4, your Spirit pool is still tight, so pick one gem and make it count. The three directions worth considering for Monk:
Offensive Options
- Herald of Thunder — If you're running any shocked-enemy synergy, this pays dividends immediately. Cold-to-shock conversion on Invoker makes this surprisingly relevant even this early.
Defensive Options
- Wind Dancer — The go-to defensive Spirit Gem for Monk. Scales evasion per stage, which compounds well with the naturally high Evasion Rating you're building toward. Early campaign is rough — this buys survivability without any active management.
Spirit Upgrades Through Campaign End
Here's what your Spirit progression realistically looks like through the campaign:
| Source | Spirit Gained | When |
|---|---|---|
| Gembloom Skull (King of the Mists) | +30 | Act 1 |
| Ignagduk, the Bog Witch | +30 | Act 3 |
| Gear affixes (Necklace, Armour) | Variable | Throughout |
Equipping a Scepter grants a flat 100 Spirit — but Monk doesn't use Scepters. Don't force an off-meta weapon just to pad Spirit numbers during leveling. The campaign sources are enough to run two Spirit Gems comfortably, and that's all you need before transitioning to maps.
Don't obsess over stacking Spirit mid-campaign. Two well-chosen Spirit Gems outperform four mediocre ones. Ghost Dance and Grim Feast carry you to the finish line.
Act 2: The Transition Point
Act 2 is where your leveling path starts to diverge based on your chosen ascendancy. All paths involve the same core skills, but the timing of when you transition and what you prioritize changes.
At level 14, you unlock Tempest Flurry, which becomes a critical tool for Act 2 bosses. If you're going Hollow Palm, you'll also start pathing toward the keystone around level 13-14, thought we recommend to wait until level 22 to actually allocate it.
The reason: Hollow Palm scales with Evasion and Energy Shield on your gear, as well as skill gem levels. If you switch to it too early without good ES/EV gear, a solid quarterstaff will actually outdamage it.
Your skill gem priorities in Act 2:
- Glacial Cascade upgrade: Prioritize this if you haven't already. By level 14, you want at least a Level 5 Glacial Cascade.
- Tempest Flurry: Get this on your second weapon set. Tempest Flurry channels lightning projectiles and shocks enemies. In 0.5, you can have up to three active Tempest Bells, which is a massive buff for single-target and bossing.
- Killing Palm: Optional, but useful. This skill generates Power Charges on killing blows, which fuels Falling Thunder. Some builds skip it entirely and use pure Glacial Cascade + Frozen Locus for clear.
- Storm Wave: This unlocks at level 22 and becomes your primary shock applicator for Invoker builds. It's a ranged lightning skill that applies shock and generates Power Charges through specific ascendancy interactions.
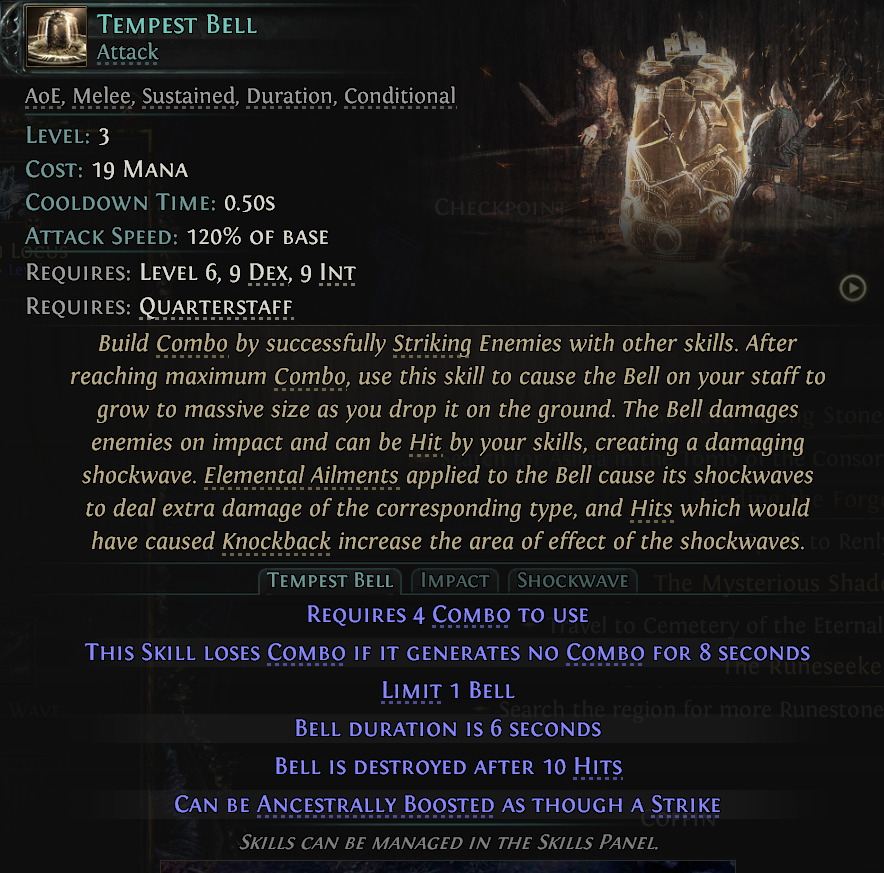
Tempest Bell got a mixed bag of changes. The big win: you can now place up to 3 Bells simultaneously (up from 1), and it can be Ancestrally Boosted as though it were a Strike — both visible in the current tooltip. The trade-off is a slight shockwave damage nerf (down from 60–132% to 45–119% of Attack Damage) and a slower shockwave trigger rate of 0.3 seconds instead of 0.25. More Bells on the ground, but each hits a little softer and slightly less often.
For support gems, keep Rapid Attacks and Rage on Glacial Cascade. Add Prolonged Duration I to Frost Bomb if you find it — this extends the Cold Exposure window, letting you maintain the resistance debuff longer. If you're using Killing Palm, Rapid Attacks I helps generate charges faster.
Act 2 is also when you start shopping for better quarterstaffs. A Crackling Quarterstaff (with lightning damage) is ideal if you can find one, but any staff with reasonable physical or elemental damage works.
Act 3 and the Hollow Palm Transition
By level 22, you've gathered enough passive tree points and skill gems to make the switch to Hollow Palm Technique. This is the critical juncture where your Monk either feels weak or feels unstoppable — and it entirely depends on your gear preparation.
If you've been stacking Evasion and Energy Shield throughout Acts 1-2, the transition is seamless. You unequip your quarterstaff, allocate Hollow Palm Technique on the passive tree, and suddenly your gloves are your weapon. Hollow Palm converts your Evasion Rating into attack speed (1% increased attack speed per 15 Evasion Rating) and your Energy Shield into critical strike chance (1% increased critical strike chance per 10 Energy Shield). This scaling is absurd once you have decent gear.
Your main skill from level 22 onward is Ice Strike (for Hollow Palm variants) or Storm Wave (for Invoker variants). Ice Strike is a ranged melee attack that freezes enemies and detonates nearby Frozen Locus shards. Storm Wave is a pure lightning skill that applies shock and chains between enemies.
For Martial Artist specifically, you're now taking ascendancy nodes that synergize with your unarmed playstyle. Way of the Stonefist (your first or second ascendancy point) transforms your gloves into Fists of Stone, which gains implicit bonuses per item level and can roll powerful martial affixes. This alone is a massive damage and defense boost.
Hollow Focus (critical for Martial Artist) spawns bells around you whenever you hit enemies with your main skill. These bells are always guaranteed critical hits, which means every skill that hits them chains the critical hit to nearby enemies. This is the foundation of Martial Artist's bell-based scaling.
By level 22, your Act 3 skill setup should look like this:
- Main damage skill: Ice Strike (Hollow Palm) or Storm Wave (Invoker)
- AoE clear: Glacial Cascade (still useful even with Hollow Palm)
- Boss damage: Tempest Flurry or Falling Thunder (if using Invoker with Power Charges)
- Utility: Frost Bomb for exposure, Pounce for mobility
Support gems at this stage are flexible, but Rapid Attacks, Rage, and Elemental Armament remain core. If you're running Tempest Flurry, add Shock Magnitude support to increase the shock effect, which scales your damage massively.
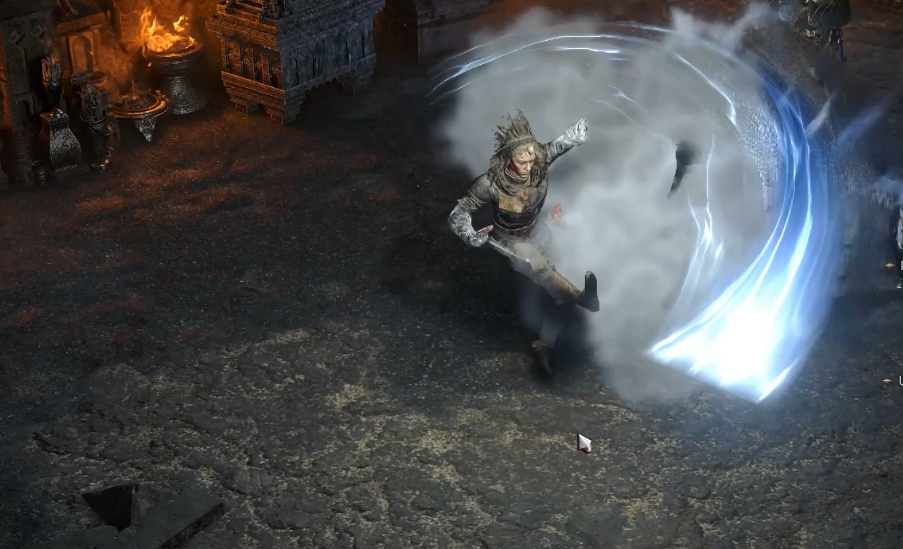
By level 16, you should have access to better gear from the Ardura Caravan. This is where you start shopping for items with Evasion and Energy Shield if you're planning to use Hollow Palm. Don't commit to the switch yet — just prepare the gear foundation.
Hollow Palm Technique is the keystone passive that defines modern Monk leveling. It's located on the right side of the Monk passive tree, roughly 15-18 points away from your starting location. You can technically allocate it as early as level 13, but most players wait until level 22 because the scaling is so dependent on gear.
Here's what Hollow Palm does: unarmed attacks (attacks with no weapon equipped) gain the benefits of staff skills. This means you can use Ice Strike, Tempest Flurry, and other quarterstaff skills while running completely unarmed. Your damage scales from Evasion Rating and Energy Shield instead of weapon damage. You also gain 1% more unarmed damage per 5 Strength, which creates another scaling vector.
The practical advantage is enormous. You never need to maintain a weapon again. Your gloves become your damage scaling tool. Any evasion or energy shield gear you find improves both your offense and defense simultaneously. This is why Hollow Palm feels so smooth — there's no gear treadmill of constantly upgrading weapons.
In 0.5, Tempest Bell (the bell spawned by Tempest Flurry) can now have up to three active bells instead of one. This is ancestral boost compatibility, which means each bell inherits benefits from certain ascendancy nodes. Combined with Martial Artist's Hollow Focus (which spawns additional bells on critical hits), you can have six bells active at once with the right setup. Each bell triggers on critical hits, dealing area damage and applying shock.
For leveling, the key is stacking Evasion and Energy Shield on every gear slot. By Act 3, you should have:
- Body Armor: High Energy Shield or Evasion base (hybrid is ideal)
- Gloves: Evasion/Energy Shield with flat damage if possible
- Boots: Movement speed + Evasion/Energy Shield
- Helm: Life/Evasion/Energy Shield
- Rings: Flat damage (physical or elemental) + resistances
- Amulet: Flat damage or attack speed + resistances
Don't stress about perfect rolls. Campaign gear is forgiving. Just prioritize the defensive stats early, then layer in damage as you find it.
Hollow Palm Technique - When to Switch? Is it Powerful?
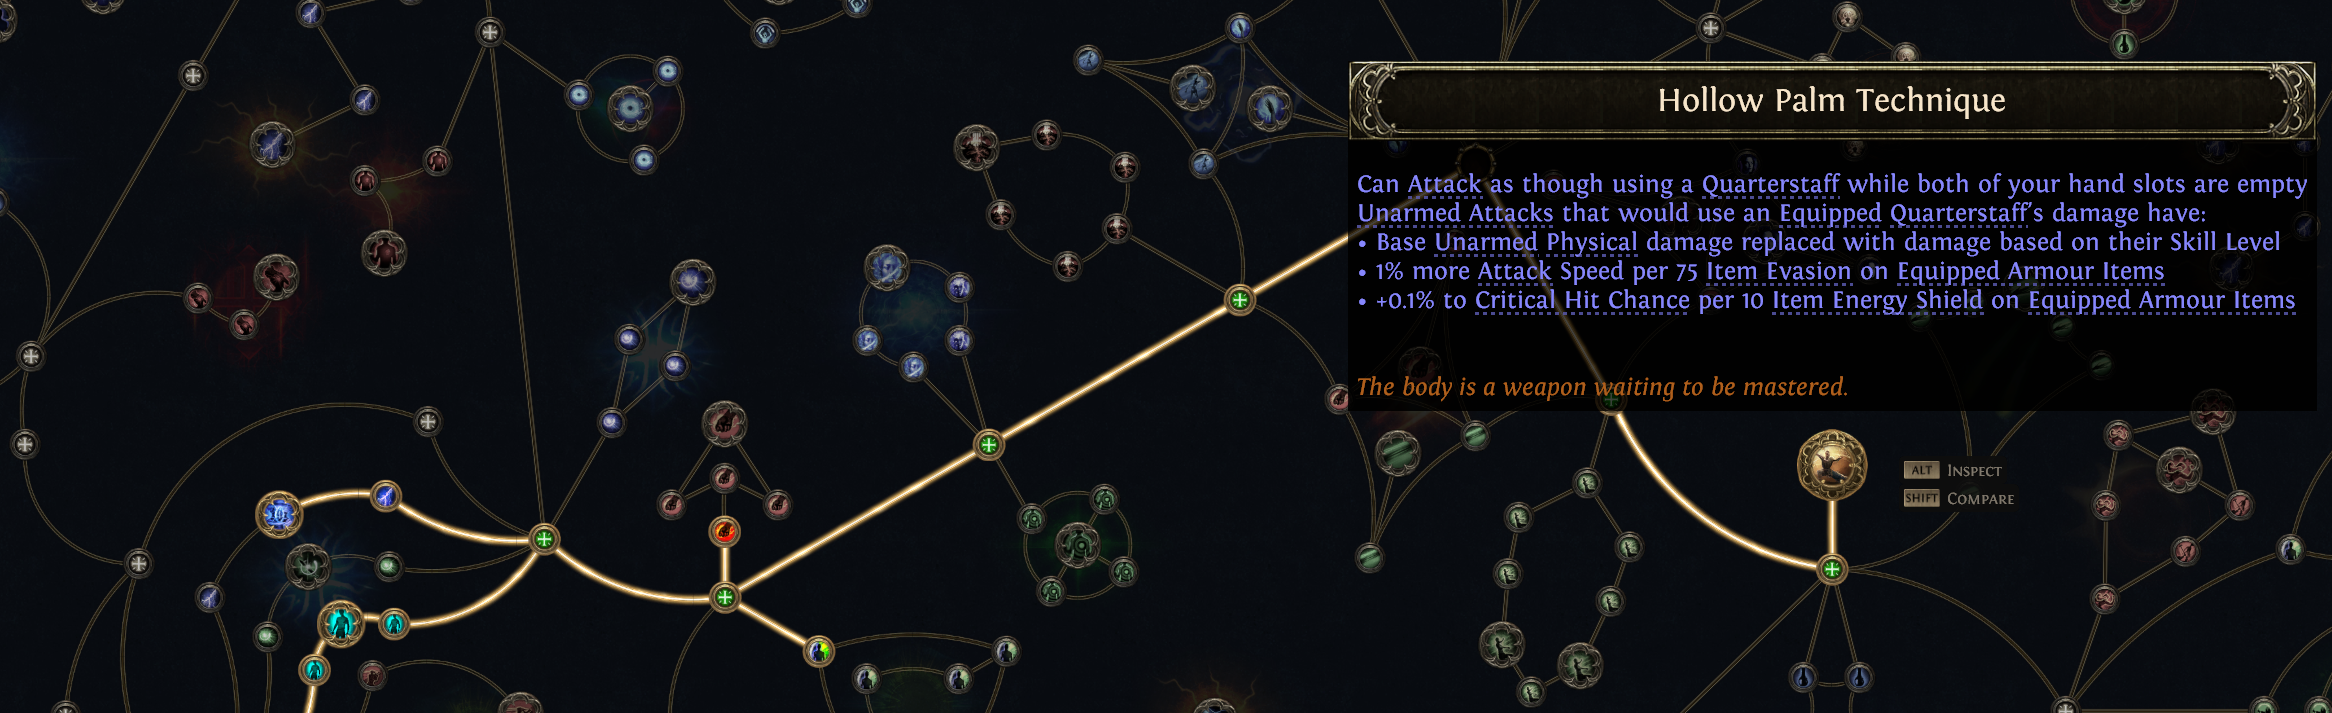
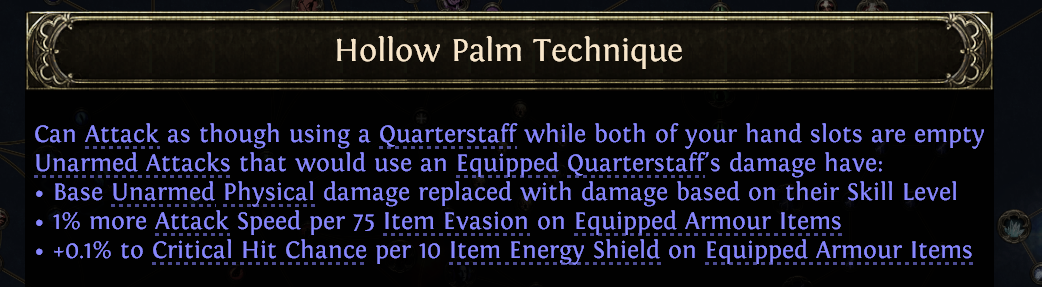
Hollow Palm Technique lets you attack as though using a Quarterstaff while both hand slots are empty — meaning your fists are your weapon. Base unarmed physical damage gets replaced with damage based on skill level, and you pick up 1% more Attack Speed per 75 Item Evasion and +0.1% Critical Hit Chance per 10 Item Energy Shield on equipped Armour Items. That last part matters more than it looks. Armour with hybrid Evasion/Energy Shield bases — which you're already hunting for survivability — passively feed both offensive stats simultaneously.
The real reason this keystone is so powerful during campaign? Weapon upgrades stop mattering entirely. No more scrambling for a decent Quarterstaff every act. No more falling behind on damage because the loot gods didn't drop something serviceable. Your damage scales through passive tree investment and skill gem levels, both of which you control directly. On league start, when currency is tight and trade is thin, that consistency is worth more than any rare weapon you'd find anyway.
When to Switch — And When to Stay Put
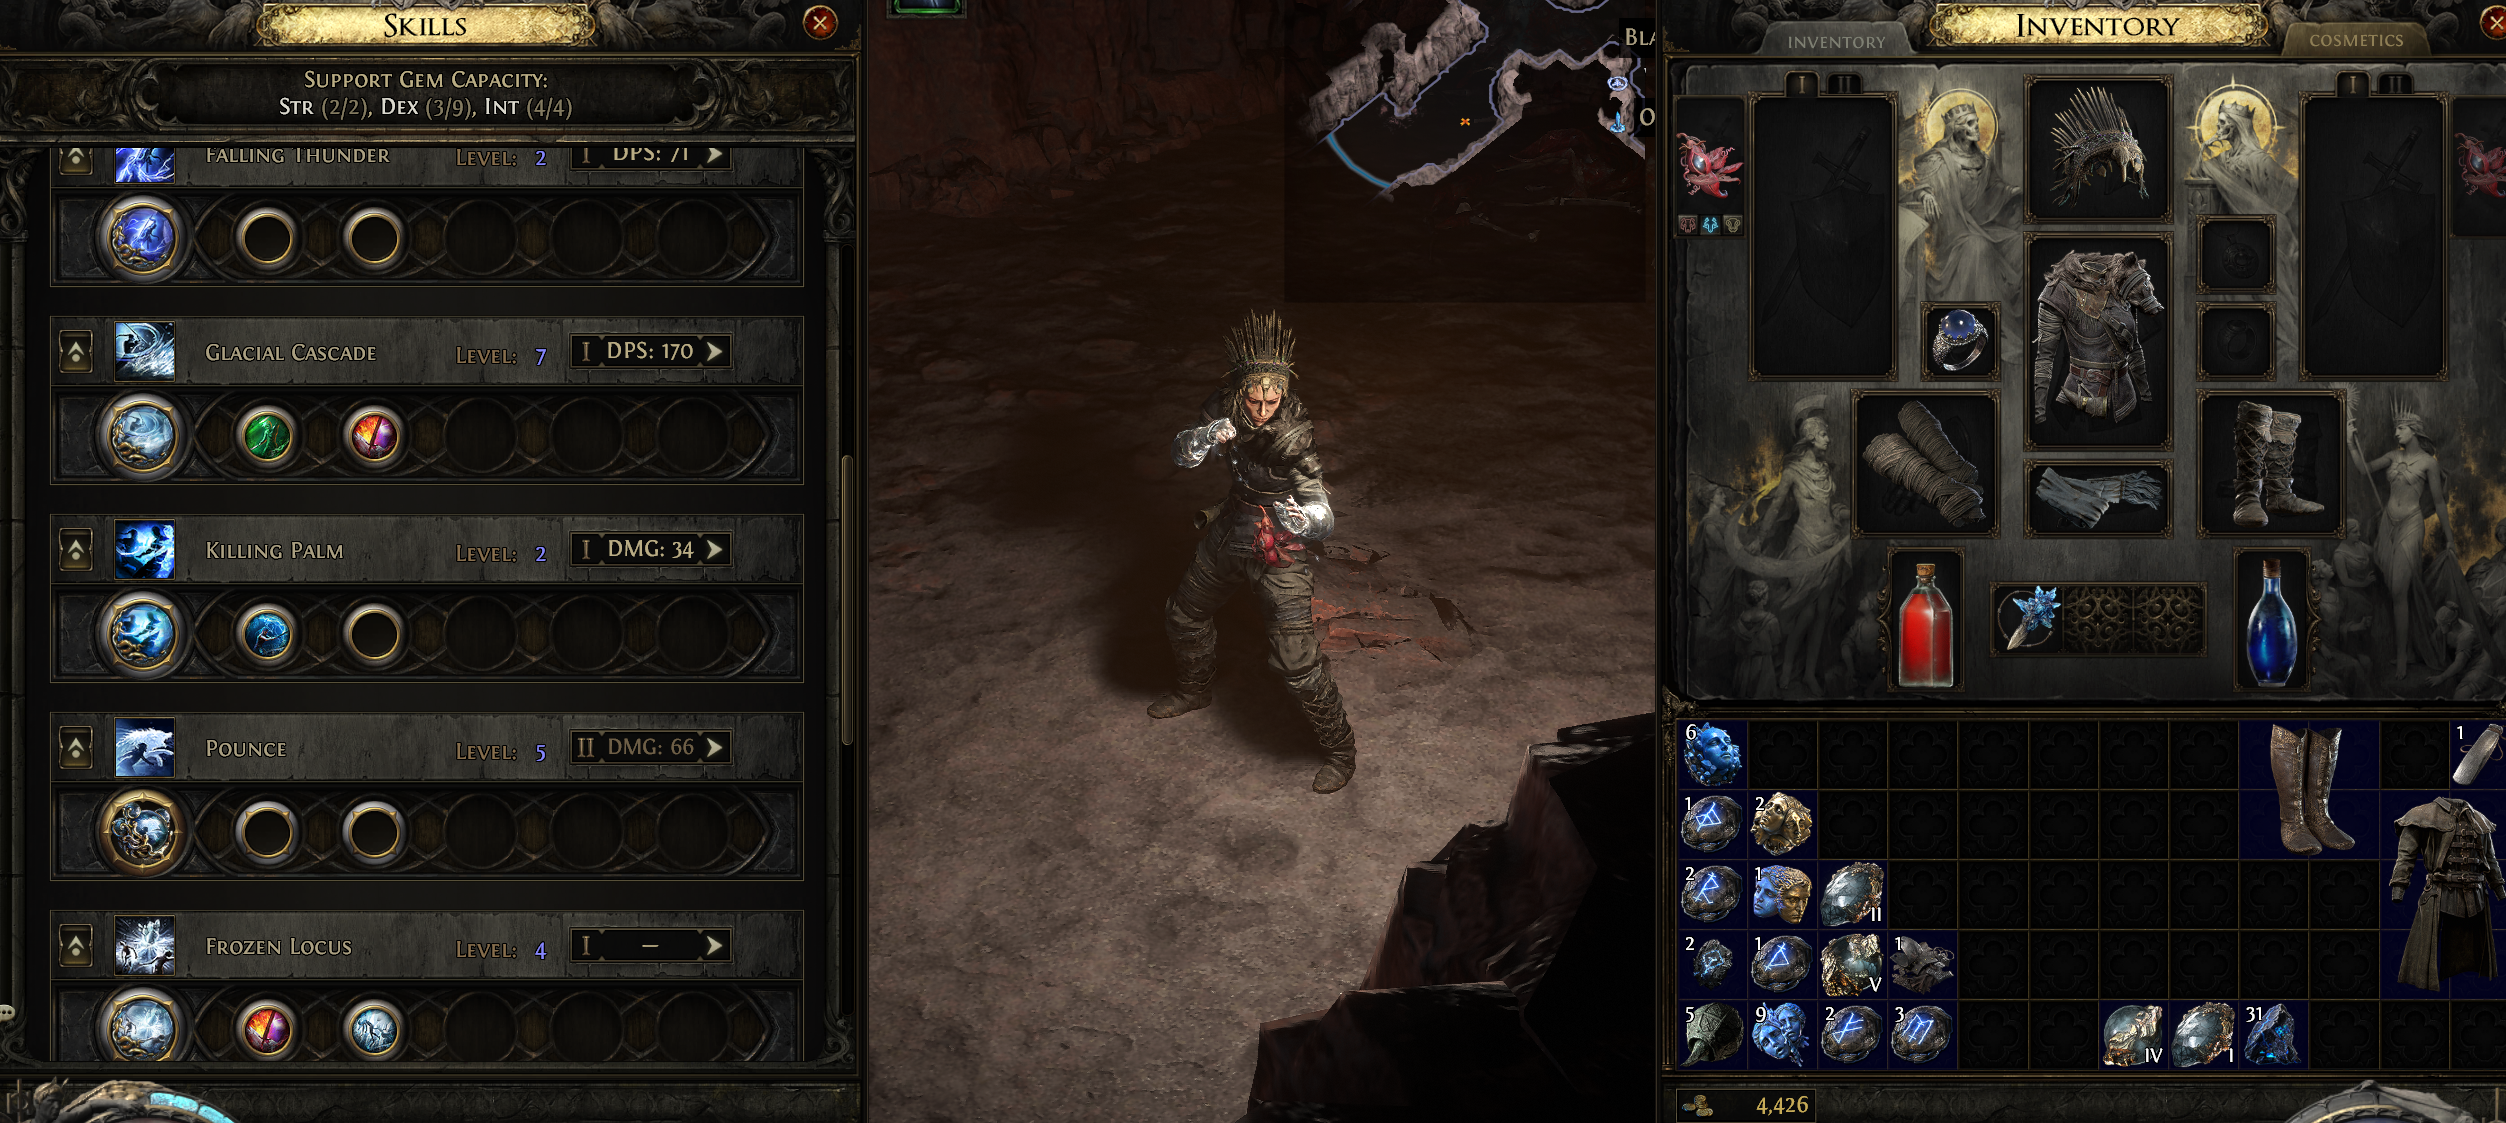
You can use the skill menu (G on PC) to check the damage of your main skill - Here Glacial Cascade with Hollow Palm result in 170 DPS, while equipping the previous Quarter Staff reduce this by 50%
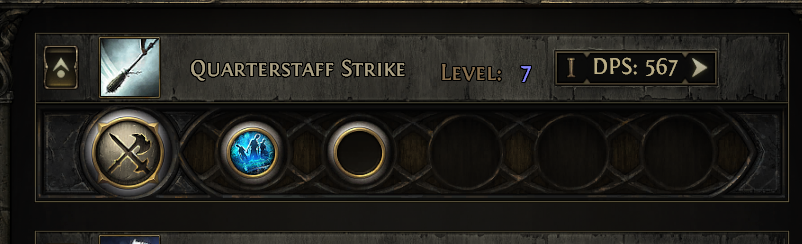
From all the POE 2 Monk Build guide - level 22 for the Hollow Palm swap is solid. That's when the keystone starts pulling its weight: flat physical damage scaling from skill level kicks in meaningfully, your passive tree has enough nodes to make the Evasion/Energy Shield synergy matter, and you're no longer dependent on whatever Quarterstaff the loot gods decided to drop. Before level 22, the math just doesn't favour it.
Switch when you have:
- Evasion/Energy Shield hybrid armour pieces on most slots — both offensive stats scale simultaneously
- At least level 22 on your primary attack skill gem
- Enough passive investment to start generating meaningful Attack Speed from the 1% per 75 Evasion line
- Empty hand slots — obviously, but worth stating because some people try to transition mid-act without swapping gear
Don't switch if you're sitting on a genuinely strong Quarterstaff find. A well-rolled rare staff in Act 2 will outperform Hollow Palm until your gem levels and gear catch up. The keystone's value is consistency, not raw ceiling — it removes the floor from collapsing on you.
Where Martial Artist Changes the Equation
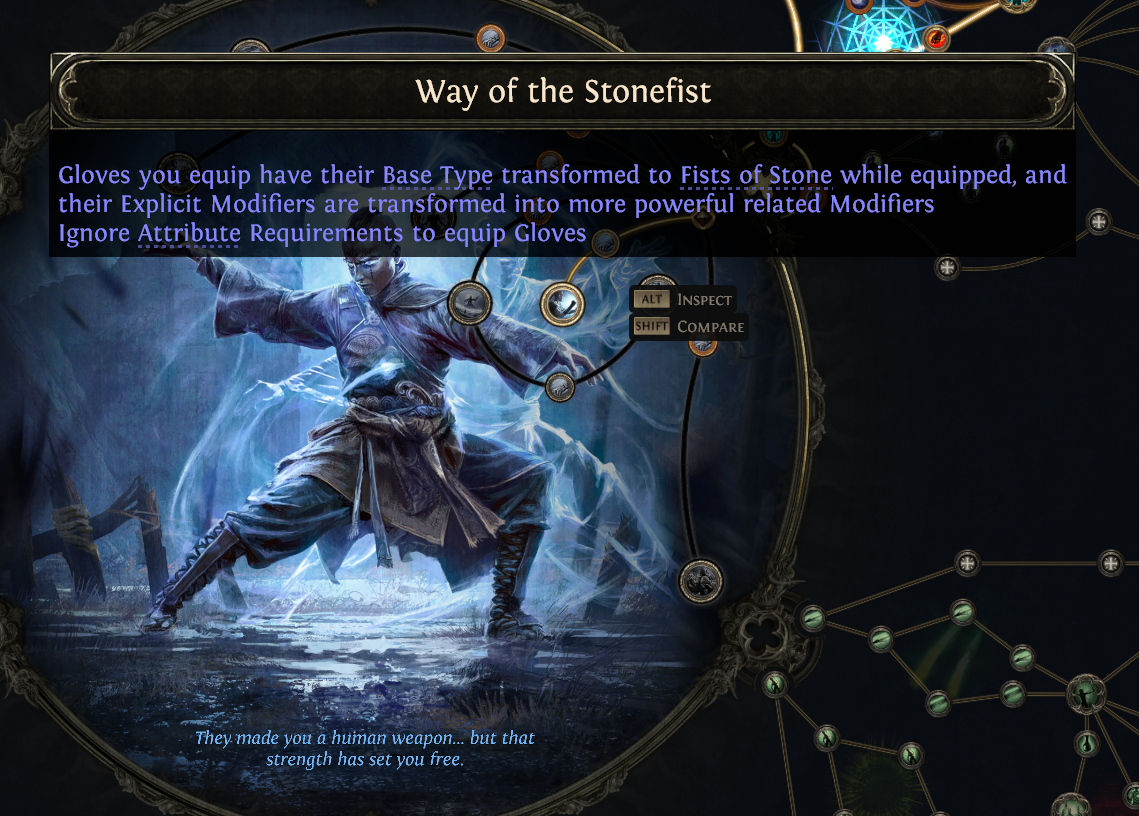
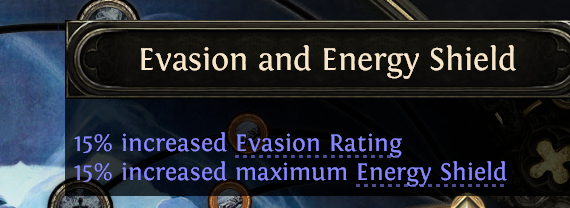
Martial Artist's Way of the Stonefist converts your gloves to the Fists of Stone base type, adding martial affixes and giving you Evasion and Energy Shield per item level as an implicit. That's free offensive scaling from the same slot that Hollow Palm already wants you optimising. The synergy isn't subtle.
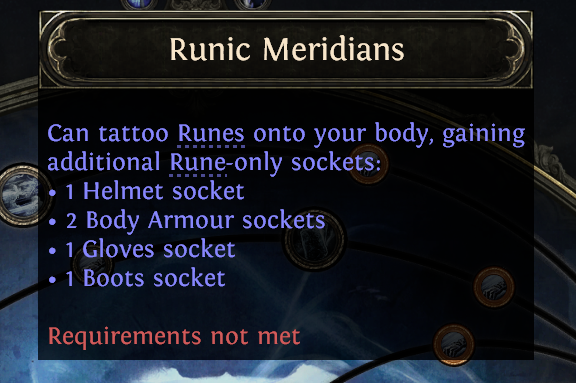
Then there's Runic Meridians — five additional Rune-only sockets across your armour. Community builds are already flagging this as a solution to the stat requirements that would otherwise cost real currency to fix mid-campaign. Hollow Palm wants specific bases; Runic Meridians lets you reach the attribute thresholds without sacrificing them.
The recommended ascendancy order from the community for Hollow Palm-focused Martial Artist: Hollow Focus first, then Way of the Stonefist. Hollow Focus spawns bells that are always primed for stun and always crit — which means it's a built-in power charge generator from the moment you take it. Power charges feeding into your attack scaling is not a small thing.
When Hollow Palm Is the Wrong Call
Running Chaos Inoculation? Way of the Mountain does not work with CI. If that's your endgame plan, the defensive node you'd normally lean on is locked out, which changes the value proposition of the entire Martial Artist defensive kit. Plan around it early, not in Act 3 when you're already committed.
Also skip the Hollow Palm transition if your EV/ES gear situation is genuinely bad. The keystone punishes you for ignoring it — you get nothing from Evasion/Energy Shield lines you don't have. A player with zero hybrid bases is better served finishing the act with a functional weapon than going bare-fisted into a damage deficit.
Martial Artist makes Hollow Palm more compelling than it's ever been. But it's still a system — one that rewards preparation and punishes improvisation. Get the gear first. Then pull the trigger.
Martial Artist Ascendancy Choices
The Martial Artist ascendancy arrived in Patch 0.5 and completely changes how Monks approach combat. This is a new ascendancy, distinct from the Invoker and Acolyte of Chayula, with its own mechanics and progression path.
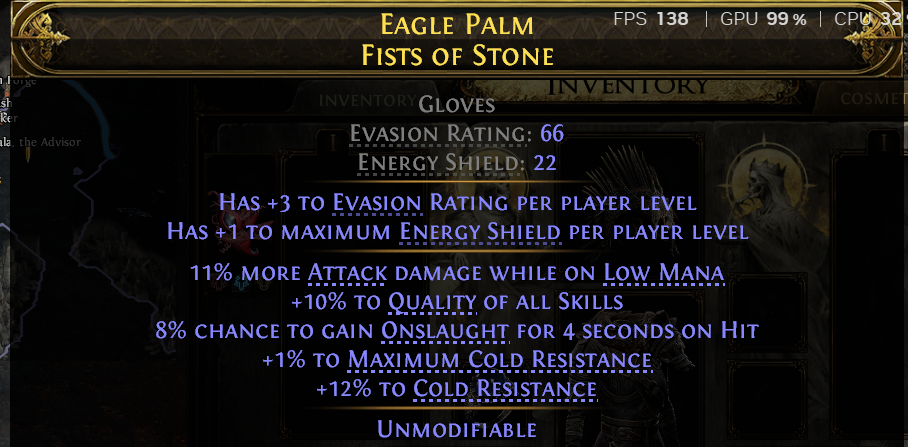
Your first ascendancy point should go into Way of the Stonefist (or Hollow Focus if you're using Martial Artist with bells). Way of the Stonefist transforms your gloves into the Fists of Stone base type, which gains implicit bonuses per item level and enables powerful martial affixes. This is a massive power spike at level 22.
Your second point depends on your build direction. If you're using Glacial Cascade + Frozen Locus, take Way of the Mountain, which grants Mountain's Teachings buff: 15% more damage and 40% damage reduction to hits that would deal 30% of max life or less. This is incredible for survivability during campaign bossing.
If you're committing to bells and spectral illusions, take Hollow Focus second. This node spawns bells around you whenever you hit enemies, and these bells are always guaranteed critical hits. The interaction is that Killing Palm hitting a Hollow Focus bell always generates a Power Charge, which fuels Falling Thunder for screen-wide damage.
Your third and fourth points are flexible. Hollow Resonance (spawns a bell on your back) adds another layer of AoE. Runic Meridians grants 5 additional Rune sockets, which becomes critical in endgame but is less important for leveling. Hollow Form summons spectral clones that replicate your attacks — this is powerful but requires investment in attack speed and positioning to feel smooth.
Most league starters follow this path: Way of the Stonefist (Act 2) → Way of the Mountain (Act 3) → Hollow Focus (Act 4) → Hollow Resonance or Runic Meridians (Act 5+).
Invoker and Acolyte Paths
If you're not committing to Martial Artist, the Invoker and Acolyte of Chayula remain viable, though they're slightly less polished in 0.5 compared to the new ascendancy.
Invoker is the classic Monk ascendancy, built around Power Charges and shock scaling. Your ascendancy nodes grant bonuses to Power Charge generation and shock effectiveness. Falling Thunder (a finisher skill that consumes Power Charges) becomes your bossing tool. The leveling path is straightforward: Storm Wave for clear, Tempest Flurry for shock application, Falling Thunder for bosses. Invoker is tankier than Martial Artist and more forgiving for beginners.
Acolyte of Chayula is the chaos-focused ascendancy, which doesn't shine until late campaign/endgame. For leveling, it feels clunky because your ascendancy nodes don't provide immediate power spikes. Skip this if you're new to the class.
Skill Gem Leveling Priority
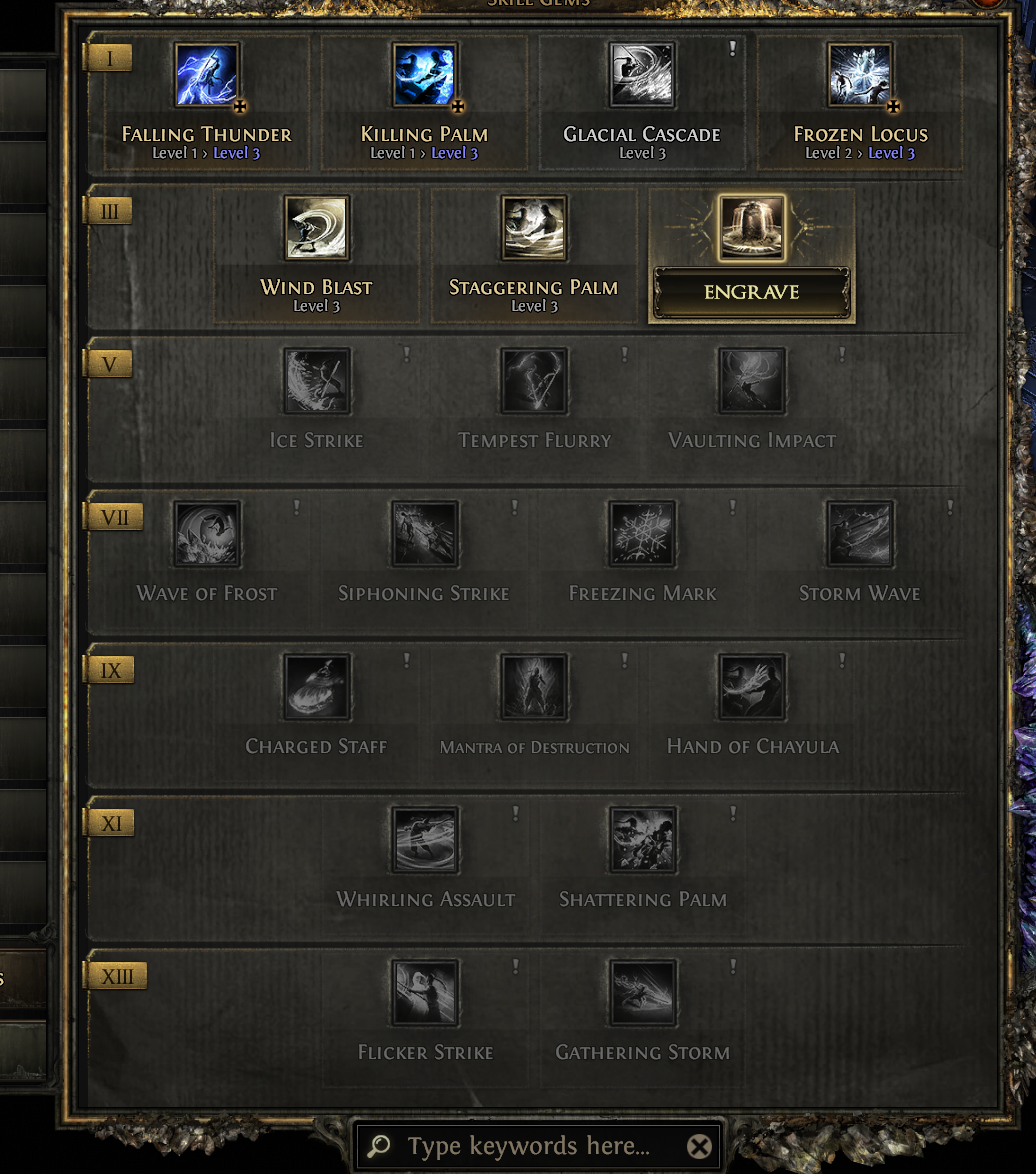
Your skill gem upgrade priority determines how smooth your leveling feels. Here's the order that most experienced players follow:
Tier 1 (Absolute Priority): Glacial Cascade. This is your main damage tool from level 1 to level 22+. Every level on Glacial Cascade is a damage increase that carries you through multiple acts. Upgrade it whenever you find an Uncut Skill Gem.
Tier 2 (High Priority): Frozen Locus. This skill's damage scales with gem level, and the combined Glacial Cascade + Frozen Locus interaction is your primary bossing tool. Keep it within 2-3 levels of Glacial Cascade.
Tier 3 (Situational): Tempest Flurry (if using it for shock application), Frost Bomb (for exposure), or Ice Strike (if transitioning to Hollow Palm early). These depend on your build direction.
Tier 4 (Nice-to-Have): Killing Palm, Falling Thunder, Storm Wave. These are powerful but not mandatory for campaign progression. Upgrade them if you have spare gems, but don't prioritize them over Glacial Cascade and Frozen Locus.
Support gems are less critical for leveling than they are for endgame. Rapid Attacks and Rage on your main skill are the essentials. Everything else is a bonus.
Gear Progression Through the Campaign
Campaign gear is forgiving, but there are a few key milestones where upgrades matter:
Level 4-6: Look for any quarterstaff with physical or elemental damage. A +1 to melee skill gems affix is huge if you can find it. Armor bases are fine here — evasion doesn't matter yet.
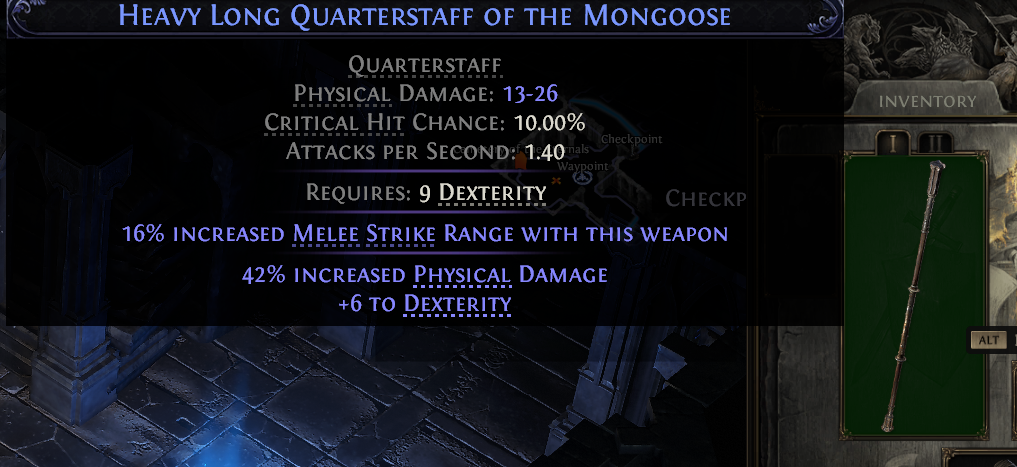
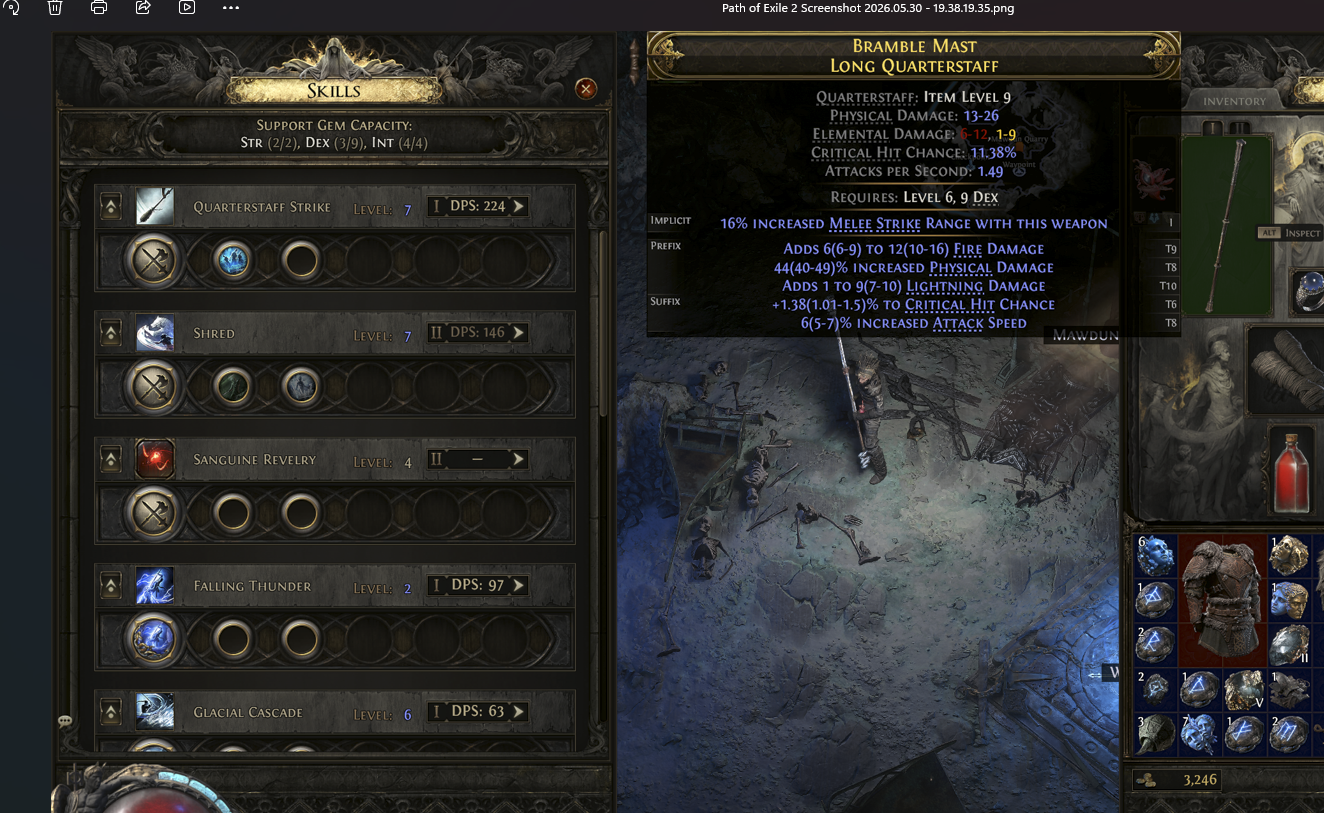
The Heavy Long Quarterstaff of the Mongoose shown here is a textbook example of what you're hunting — 13–26 Physical Damage, 1.40 Attacks per Second, 10% Critical Hit Chance, and crucially, 42% increased Physical Damage plus +6 Dexterity as magic affixes. That 16% increased Melee Strike Range is a bonus on top.
Simple priority: flat Physical Damage combined with increased Physical Damage. That's the combo. Everything else is secondary.
- Level 11: Time to upgrade your quarterstaff again. Look for attack speed or additional elemental damage. This is when you start noticing the difference between a mediocre staff and a good one.
- Level 16: Major shopping spree at the Ardura Caravan. This is when better gear tiers unlock. If you're planning to use Hollow Palm, start looking for Evasion/Energy Shield bases. If you're staying unarmed with Invoker, prioritize life and resistances.
- Level 20: Another gear tier unlock. Your quarterstaff should be a Slicing Quarterstaff or Crackling Quarterstaff by now. If you're still using a basic staff, farm a bit of currency and upgrade.
- Level 22 (Hollow Palm transition): This is where gear becomes critical. You need at least 100+ Evasion Rating and 30+ Energy Shield across your gear to feel the damage difference. If you don't have this, stay with your quarterstaff a bit longer and farm better gear before committing to Hollow Palm.
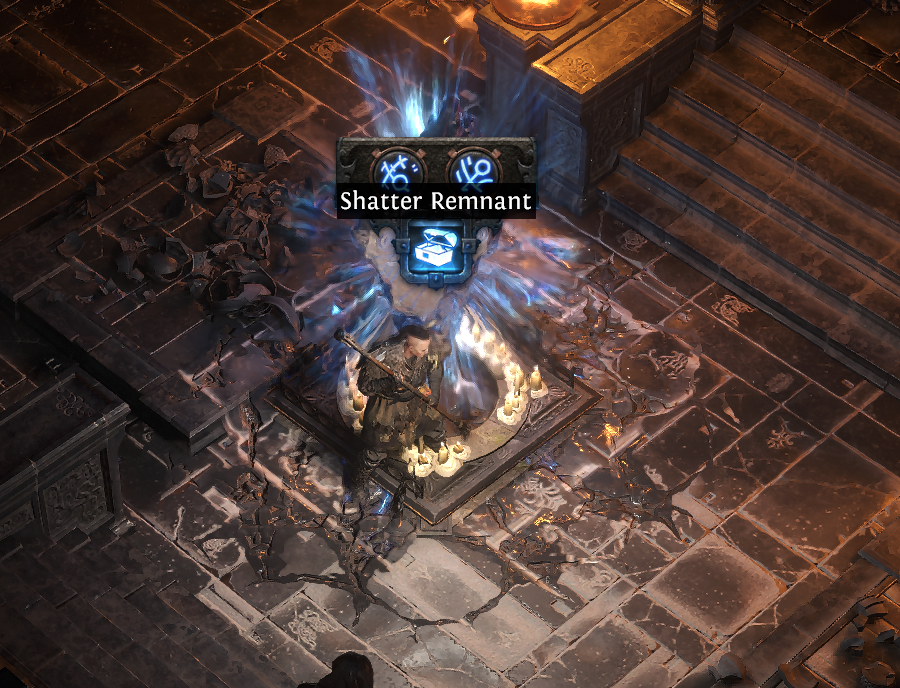
Rune Crafting: Why It Makes Leveling Smoother for Every Class
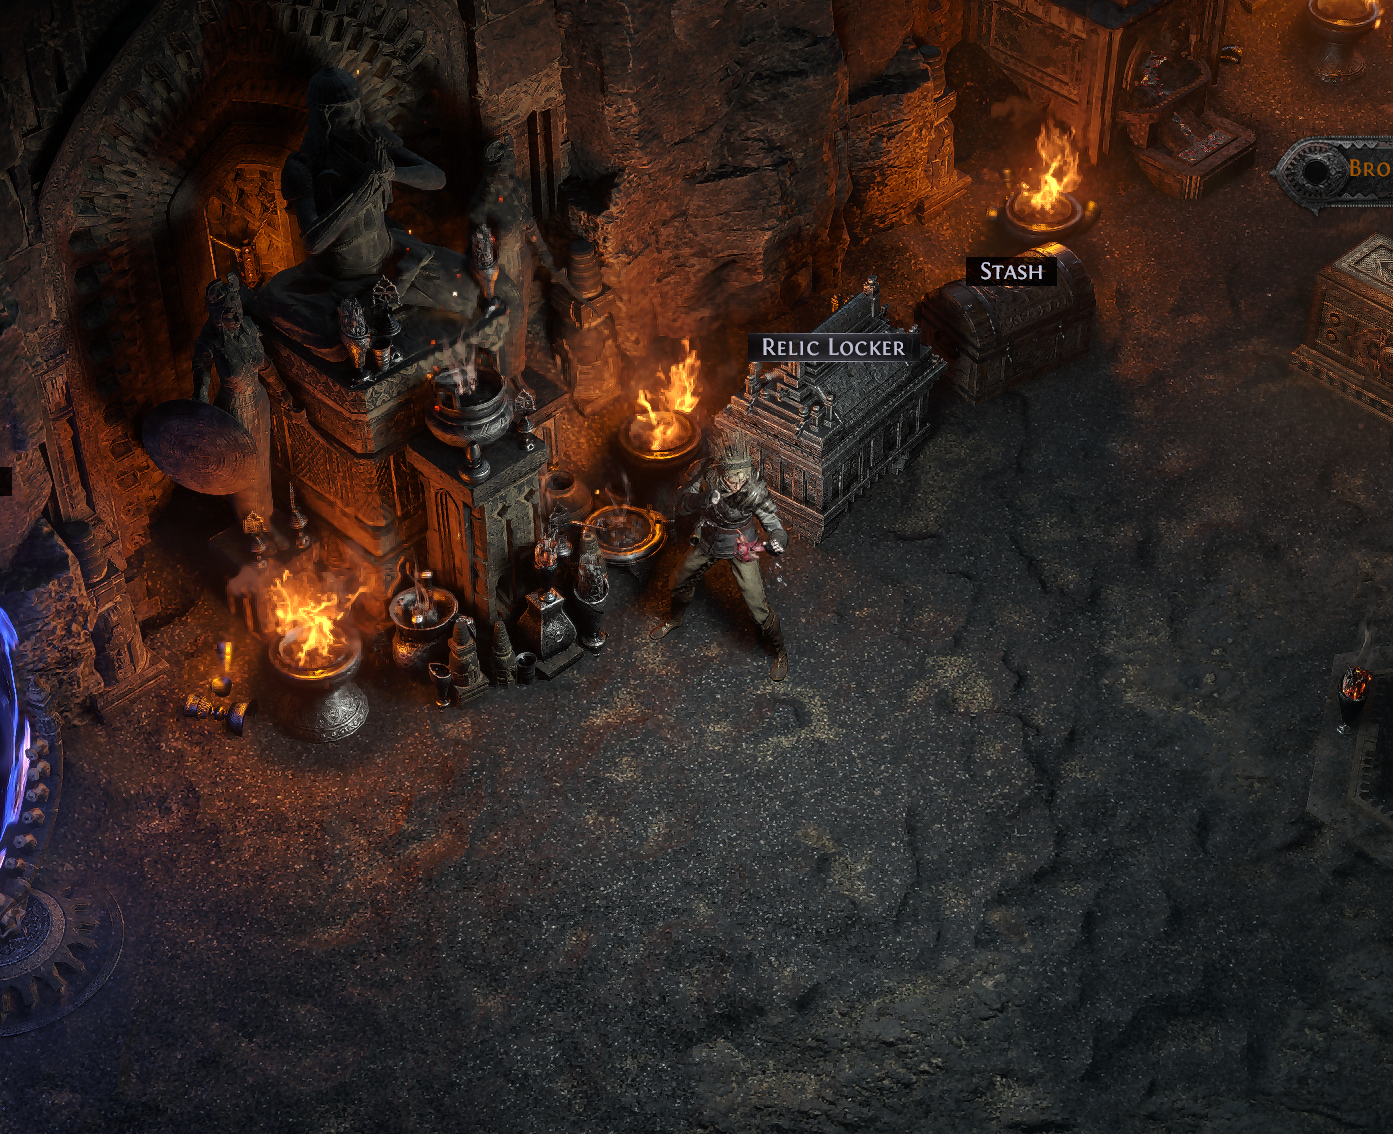
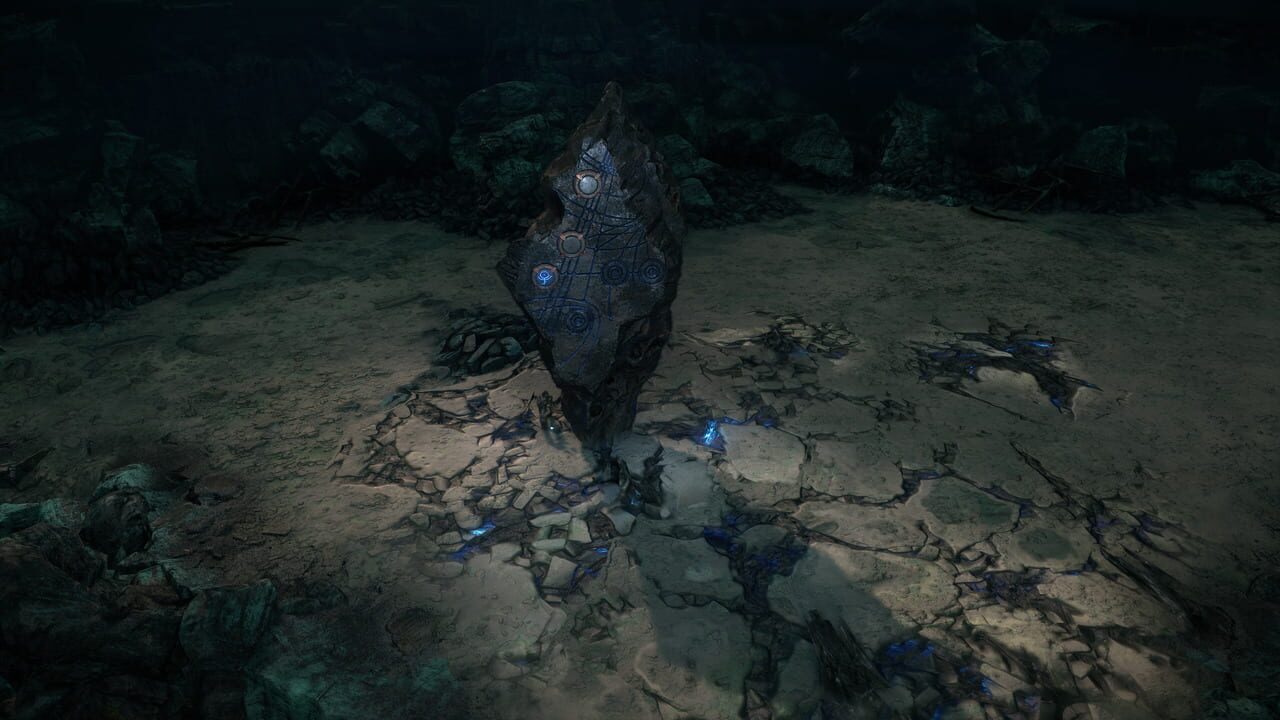
The screenshot shows a Shatter Remnant — one of the Ezomyte Remnant encounters that sits at the heart of 0.5's new Rune Crafting mechanic. And this is exactly where the leveling experience changes for everyone, not just Monk.
Here's the short version: Runesmithing gives you access to guaranteed crafting currency during the campaign. Knowing specific recipes early — even something as simple as guaranteeing an Orb of Augmentation — makes the campaign dramatically smoother. No more praying at the altar of RNG for a usable weapon upgrade. You interact with a Remnant, fight the waves it spawns, collect rune symbols, and craft. Simple loop. Real results.
The new Mythical Runes — available from Remnants and significant for characters level 15 and above — mean you can slot meaningful bonuses into gear right in the middle of Act 1 and Act 2. For Monk specifically, this plugs directly into the Glacial Cascade foundation covered earlier in this guide. But a Ranger, Sorceress, or Mercenary benefits just as much. The rune system doesn't care what class you are.
What actually changes the feel of leveling is the Runic Ward system. The new Calguran skills — unlocked through this same mechanic — require no mana and no specific attributes. Any class can use them. Ward generated from augmented gear fuels these skills directly, which means your defensive layer and your offensive toolkit grow together as you craft better gear through Remnants.
So instead of hitting Act 2 with a weapon three levels out of date because nothing dropped, you're actively shaping your gear through Runesmithing. Leveling stops feeling like a lottery. That's the real win here — and it applies to every build, every class, every playstyle.
Throughout the campaign, always prioritize: Life → Resistances → Evasion/Energy Shield (if Hollow Palm) or Armor (if weapon-based) → Damage.
Passive Tree Pathing for Monk Leveling
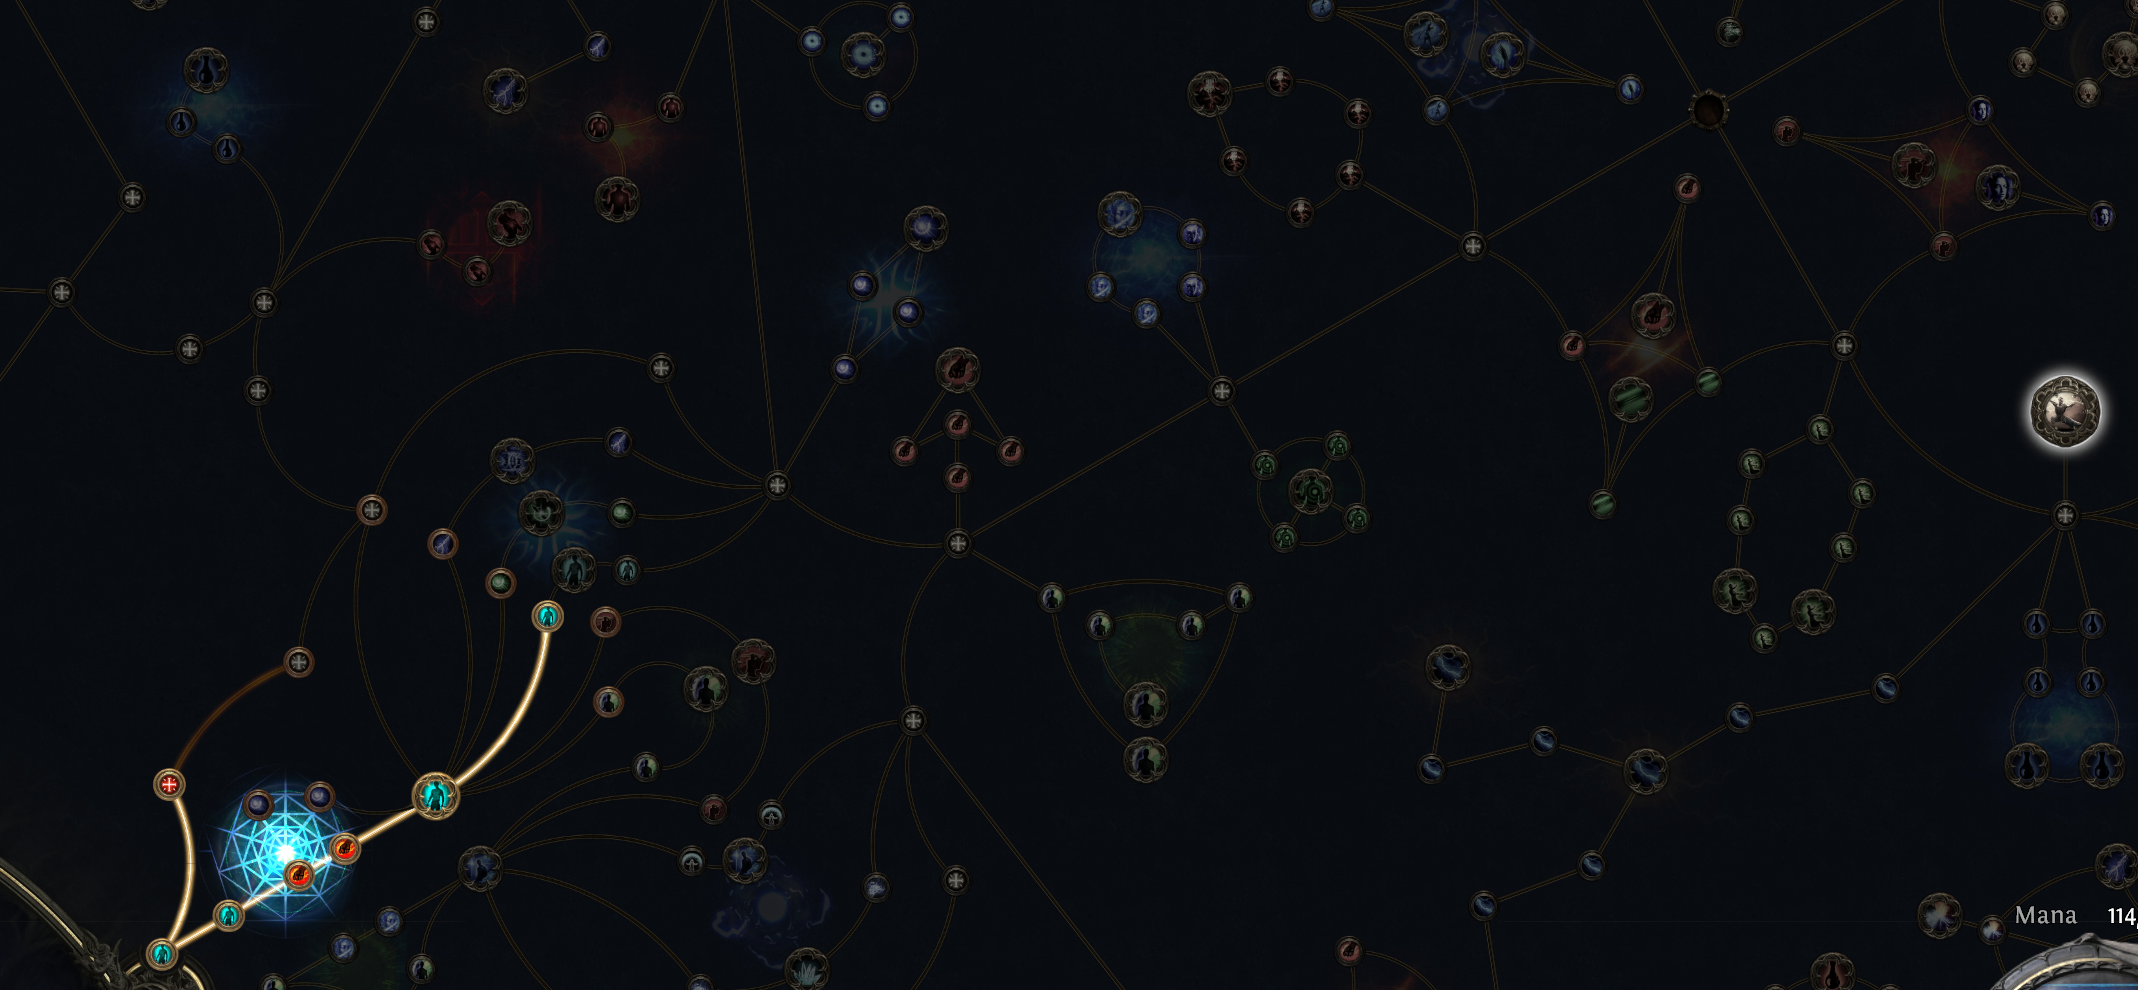
The Hollow Palm Technique keystone sits on the far right edge of the passive tree — visible in the screenshot. You can reach it with roughly 12 passive points, which puts you at approximately level 12–16 for a natural pickup. Realistically though, most players grab it closer to level 20, right after completing the first Ascendancy trial. That's the sweet spot where the keystone actually starts pulling its weight.
Early pathing (Levels 1-20): Move toward Hollow Palm Technique if you're committing to that path. This means heading right and down from the Monk starting area, picking up attack speed and evasion nodes along the way. If you're using weapons, grab life nodes and attack speed instead.
Key nodes to prioritize:
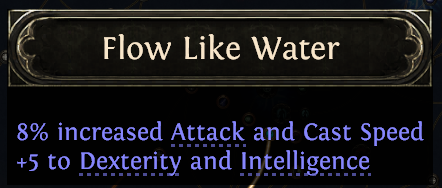
- Flow Like Water (attack speed and movement speed)
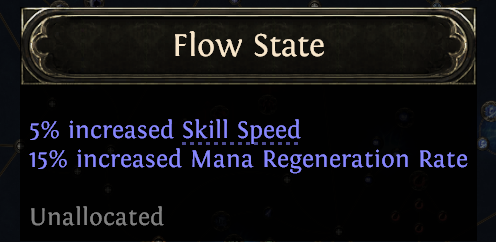
- Flow State (more attack speed)
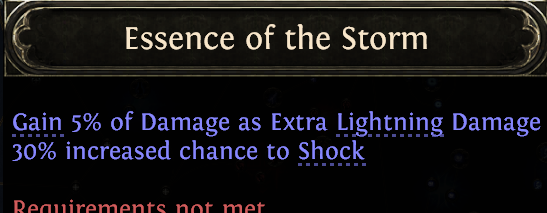
- Essence of the Storm (lightning damage, useful for Storm Wave and Tempest Flurry)
- Blinding Strike (damage boost before allocating Hollow Palm)
- General Electric (lightning damage synergy)
- Harmonic Generator (shock effectiveness)
Hollow Palm transition (Level 22): Once you allocate Hollow Palm, refund Dizzying Sweep (if you took it) and pivot your tree toward Evasion scaling. Grab nodes that grant Evasion Rating or Energy Shield. Don't worry about crit yet — that comes later in endgame.
Act 3+ pathing: After Hollow Palm, your tree direction depends on your ascendancy choices. If you took Way of the Mountain, grab nodes that improve stun threshold and immobilization. If you're using Hollow Focus bells, grab nodes that improve critical strike chance and damage.
Don't overthink the passive tree during leveling. You have plenty of respec points, and the campaign is forgiving. If you make a suboptimal choice, you can fix it later.
Boss Encounters: Act Bosses and Tactics

Boss Encounters: Act Bosses and Tactics
The campaign bosses in 0.5 hit harder and move faster than most new players expect. For a Monk running Glacial Cascade into Hollow Palm, the approach stays consistent across all four acts — freeze everything, maintain distance during telegraphed slams, and never stop generating Freeze buildup. Here's the rundown from Act 1 through Act 4.
Act 1 — Count Grenor
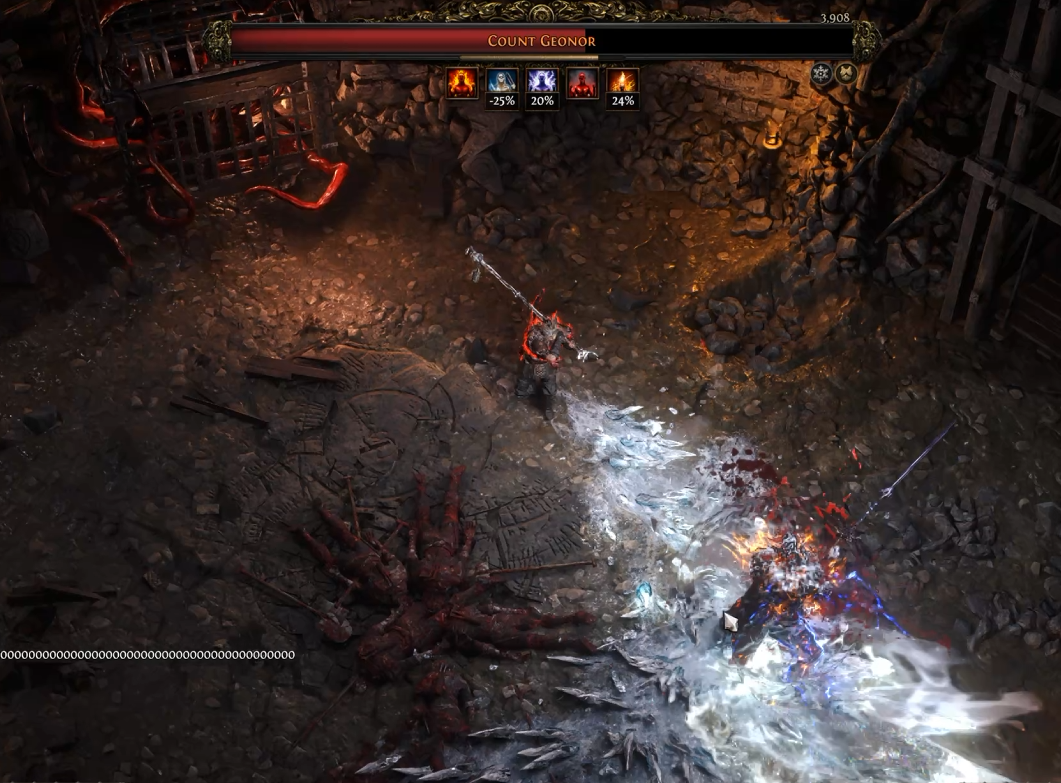
The final boss of Act 1 is a straightforward DPS check by Monk standards. Glacial Cascade handles the bulk of the work here — position yourself to funnel the cascade through his body, dodge the slam telegraphs, and he goes down cleanly. The fight rewards patience over aggression. Don't facetank. You're a Monk, not a Marauder.
Pick up the Cold Resistance reward from Beira of the Rotten Pack before this fight if you haven't already. That 10% Cold Resistance matters for survivability in the later acts.
Act 2 — Jamanra, the Abomination
This is the first real wall. Jamanra is a multi-phase fight that punishes poor positioning hard. He has wide-sweeping melee attacks and ground-slam AoEs that cover a surprising amount of arena space.
Glacial Cascade still works fine here, but you need to stay mobile. Freeze him whenever possible to interrupt his attack chains. The Lightning Resistance boost from the Sisters of Garukhan shrine in Spires of Deshar — grab it before entering the Dreadnought. It directly mitigates some of Jamanra's elemental pressure in later phases.
Act 3 — Doryani, Royal Thaumaturge
The most mechanically complex boss of the first three acts. Doryani has multiple phases, a punishing lightning-based kit, and punishes players who stand still. If you've already transitioned to Hollow Palm by Act 3, this fight feels dramatically different — your damage output spikes, but you're also squishier without a weapon contributing to defenses.
Use Glacial Cascade to chunk his health between phases. Save your biggest burst windows for when he's stationary during ability casts. The Reforging Bench from Mektul, the Forgemaster in the Molten Vault is a key reward to grab before pushing toward Doryani — having well-rolled gear at this stage makes the difference.
Act 4 — Tavakai, the Fallen
Tavakai is the final campaign boss and he does not pull punches. The fight has three distinct phases. In Phase 1 and 2, he summons jade statues — Phase 2 spawns three to five of them simultaneously and they activate immediately. Prioritize the statues or they will overwhelm you.
He fires multiple streams of blood that apply shock, ignite, and a negative fire resistance curse — a nasty combination for any build. At 25% health, he transforms into Tavakai, the Consumed, gaining new abilities including blood crystal eruptions that explode after a short delay. Watch for the avoid cue on the ground eruptions.
For Hollow Palm Monk, the strategy is burst and reposition. You want to be aggressive during his melee animation recovery windows and completely out of range during his transformation sequence. Glacial Cascade can still be used for kiting phases. Don't forget to collect the 5% Maximum Mana reward from the Eye of Hinekora and the Omniphobia skill points from Journey's End before entering the final arena — every stat point counts here.
General Boss Tips for Monk
- Always pre-stack Freeze buildup before boss phases transition — a frozen boss skips dangerous abilities entirely
- Grab all resistance rewards before each act's final boss — Cold from Act 1, Lightning from Act 2, Fire from Act 3
- The Hollow Palm transition makes Act 4 significantly easier if done correctly, but your survivability window shrinks — don't get greedy
- Skill points from side bosses matter — Kabala, Mighty Silverfist, and the Crowbell all award two points each; skip them and your passive tree will feel the gap
Common Mistakes to Avoid
These are the leveling pitfalls that trip up new Monks:
- Switching to Hollow Palm too early. If you allocate Hollow Palm at level 13 without proper gear, you'll feel weaker than staying with a quarterstaff. Wait until level 22 when you have decent Evasion/Energy Shield pieces.
- Not upgrading Glacial Cascade. Glacial Cascade carries your entire campaign. If you neglect its upgrades to prioritize other skills, your clear speed and boss damage will suffer. Prioritize it above everything else.
- Ignoring Cold Exposure. Frost Bomb is not optional. The 25% Cold Resistance reduction it applies is a massive damage multiplier. Cast it on bosses and keep it up. The gem is free; there's no reason to skip it.
- Neglecting resistances. By Act 2, you should be capping cold and lightning resistances. If you're dying to elemental damage, it's usually because you're running with -30% resistances. Grab resist nodes on the passive tree or find gear with resist rolls.
- Over-investing in weapons. Don't spend all your currency on a perfect quarterstaff. Campaign gear is temporary. Spend enough to feel comfortable, then save currency for endgame. A mediocre staff with good skill gems outperforms a perfect staff with bad gems.
- Forgetting to use second weapon set. Tempest Flurry should be on your second weapon set, not your first. This lets you swap between Glacial Cascade (clear) and Tempest Flurry (shock application) without losing your main skill setup. Use the weapon swap hotkey (X by default) to toggle between them.
Transitioning to Maps
You've cleared the Epilogue. The campaign is done. Now what?
The good news: whatever gear carried you through Act 4 and the Interludes is almost certainly good enough for early white maps. Don't overthink this. Monks who spend two hours "optimizing" before touching a Waystone are just stalling. Your Epilogue kit — decent evasion or Energy Shield chest, a weapon with physical damage that your skills can convert, movement speed on boots — will handle Tier 1 through Tier 4 without drama. White map monsters hit like campaign monsters. You've already survived worse.
That said, a few quick checkboxes before you start feeding Waystones:
- Resistances capped at 75% — non-negotiable. Maps scale elemental damage fast.
- Movement speed on boots — 20% minimum. Slower than that and you're leaving clear speed on the table for no reason.
- Weapon base — if your physical DPS feels sluggish, this is the one thing worth a quick trade before diving in.
Your ascendancy matters here more than your gear does. Invoker players are already sitting on a smooth transition — the charge-based scaling that carried you through Act 3 and 4 keeps compounding into maps, and Glacial Cascade with Frozen Locus still deletes packs efficiently at white tier. Acolyte of Chayula runs a different rhythm — more aggressive, more reliant on positioning — but the survivability from your Chaos Inoculation pathing makes you surprisingly tanky against early map modifiers.
Start with clean Waystones. No scary modifiers. No "monsters deal 40% increased damage" until your resistances are sorted and you've got a feel for your map clear speed. Skip the bad ones — there's no shame in it, and early map deaths hurt your momentum more than they're worth.
One thing that catches people off guard: the jump from campaign to maps isn't a difficulty spike, it's a pace shift. The campaign had checkpoints, story beats, forced stops. Maps don't. You set your own tempo now, and the Monk rewards players who keep moving.
This is just the beginning — and frankly, where Monk gets genuinely interesting. VietRPG has full Monk endgame build guides in the pipeline: dedicated Invoker scaling, Acolyte map farming setups, and Atlas progression breakdowns for both ascendancies. Stay tuned. The campaign was the tutorial.
Final Thoughts on 0.5 Monk Leveling
Patch 0.5 transformed Monk from a clunky early-game experience into one of the smoothest league starts in Path of Exile 2. The combination of Hollow Palm Technique's scaling, the new Martial Artist ascendancy's mechanics, and the improved early-game skill gem availability creates multiple viable progression paths.
The key to smooth leveling is committing to a path early (Hollow Palm, Martial Artist bells, or Invoker Power Charges) and following the skill gem and gear priorities outlined here. Don't try to do everything at once. Pick a main skill, upgrade it consistently, and layer in utility skills as you unlock them.
By the time you reach Act 3 and transition to Hollow Palm or your chosen ascendancy, you should feel genuinely powerful. The damage ramps hard once you have decent gear and key ascendancy nodes allocated. If you're feeling weak at any point, the issue is almost always one of: undergeared, skill gems not upgraded, or wrong ascendancy choice for your build direction.
Run the campaign with confidence. The Monk has never been better positioned for league start success.
Câu hỏi thường gặp về Path of Exile 2
- Ngày phát hành Path of Exile 2 là khi nào?
- Path of Exile 2 dự kiến phát hành vào ngày 6/12/2024.
- Path of Exile 2 chơi được trên nền tảng nào?
- Path of Exile 2 hỗ trợ: Xbox Series X|S, PC (Microsoft Windows), PlayStation 5, Mac.
- Path of Exile 2 thuộc thể loại gì?
- Path of Exile 2 thuộc thể loại: Role-playing (RPG), Hack and slash/Beat 'em up, Adventure.
- Có trailer chính thức của Path of Exile 2 không?
- Có. Bạn có thể xem trailer của Path of Exile 2 ngay trên trang này ở phần video.
Khám phá thêm
PoE 2 Patch Notes 0.5.2 Summary: Every Change That Matters for Your Build
Path of Exile 2 patch 0.5.2 dropped on June 12, 2026, and it's one of the more player-friendly mid-league updates GGG has put out. Delirium got easier, Runes of Aldur rewards got better, a wave of monsters got their damage tuned down — and there was a brief, chaotic moment where Gemling Legionnaire nearly got quietly gutted before GGG walked it back. Here's everything that actually matters for your build.
PoE 2 Crafts: The Complete Runeforging & Runic Ward Guide for Patch 0.5
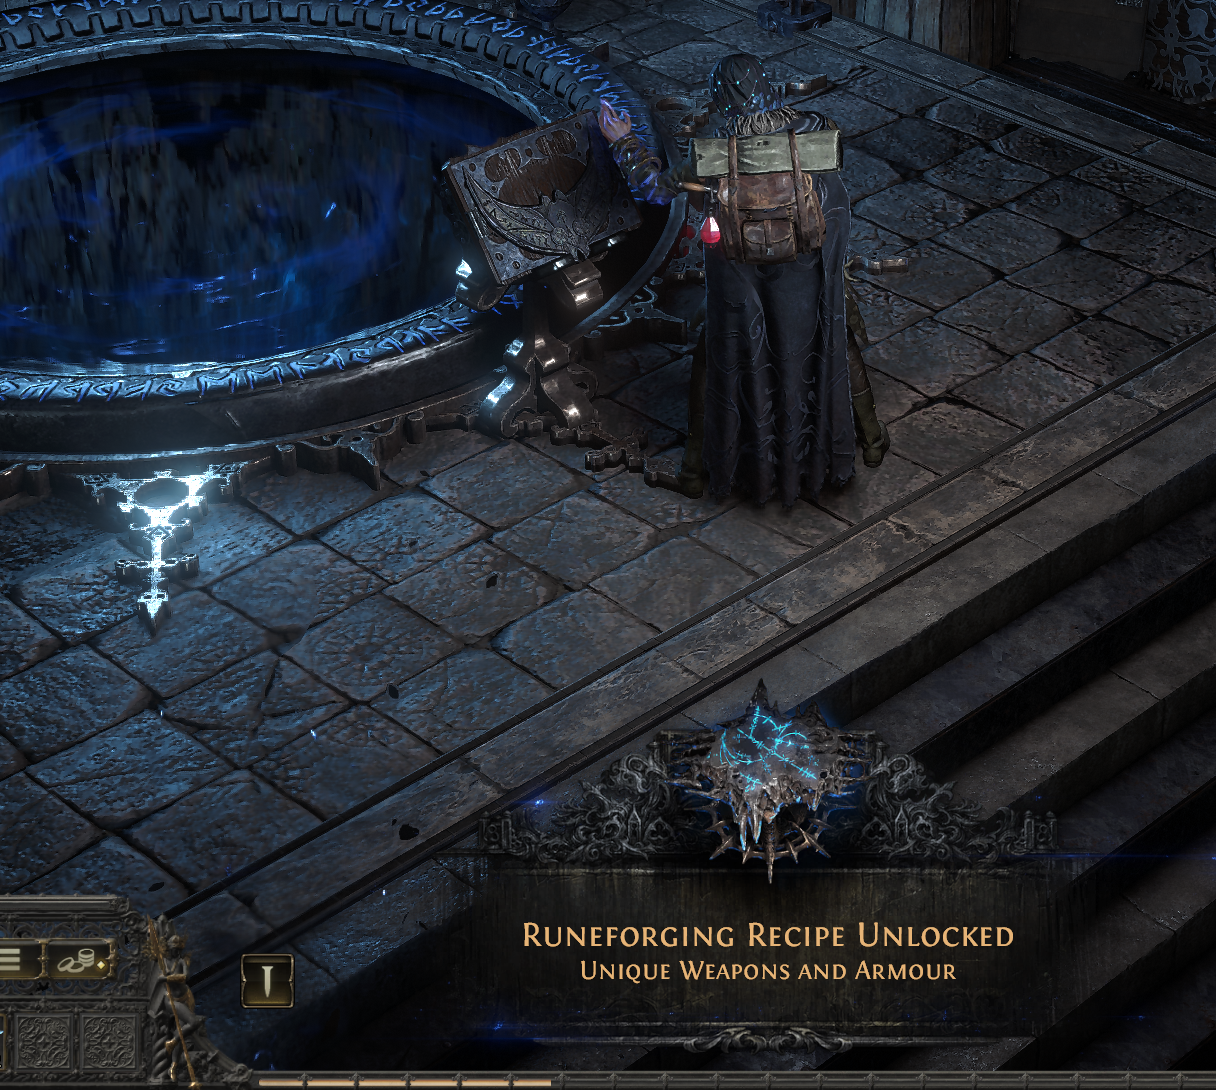
Master PoE crafts in patch 0.5: Complete Runeforging & Runic Ward guide. Learn verisium farming, ezomyte runesmithing, unique upgrades & crafting strategies.
PoE 2 Runic Support Gems: Reddit's Best Builds & Scaling Tips (Patch 0.5)
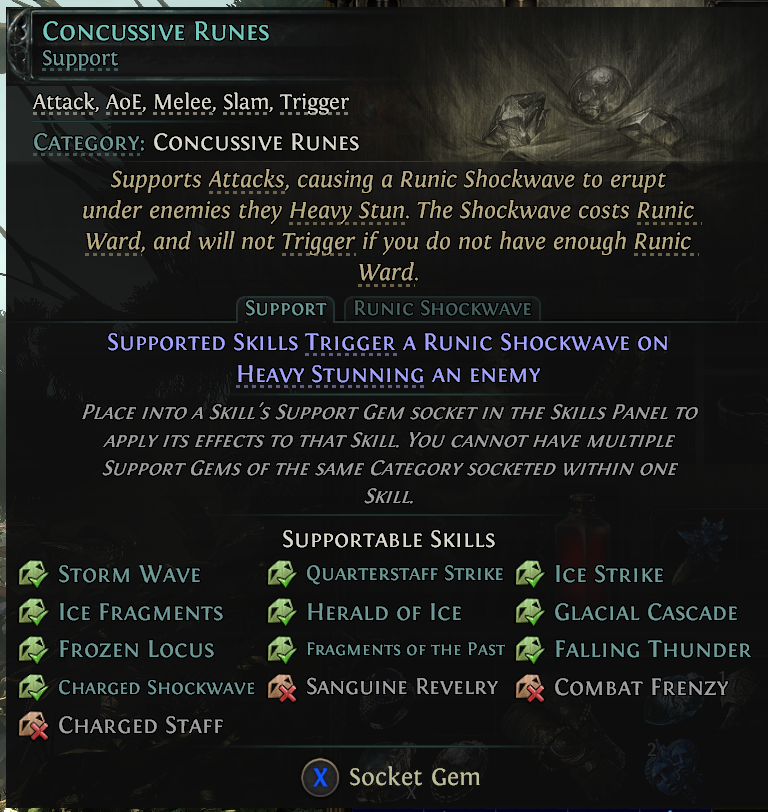
Patch 0.5 introduced Runic Support Gems that let any class use any skill. Discover Reddit's best builds, Runic Infusion scaling strategies, and how to optimize Ward-based damage for endgame.
Path of Exile Reddit: Runic Skills, Builds & Community Troubleshooting Guide
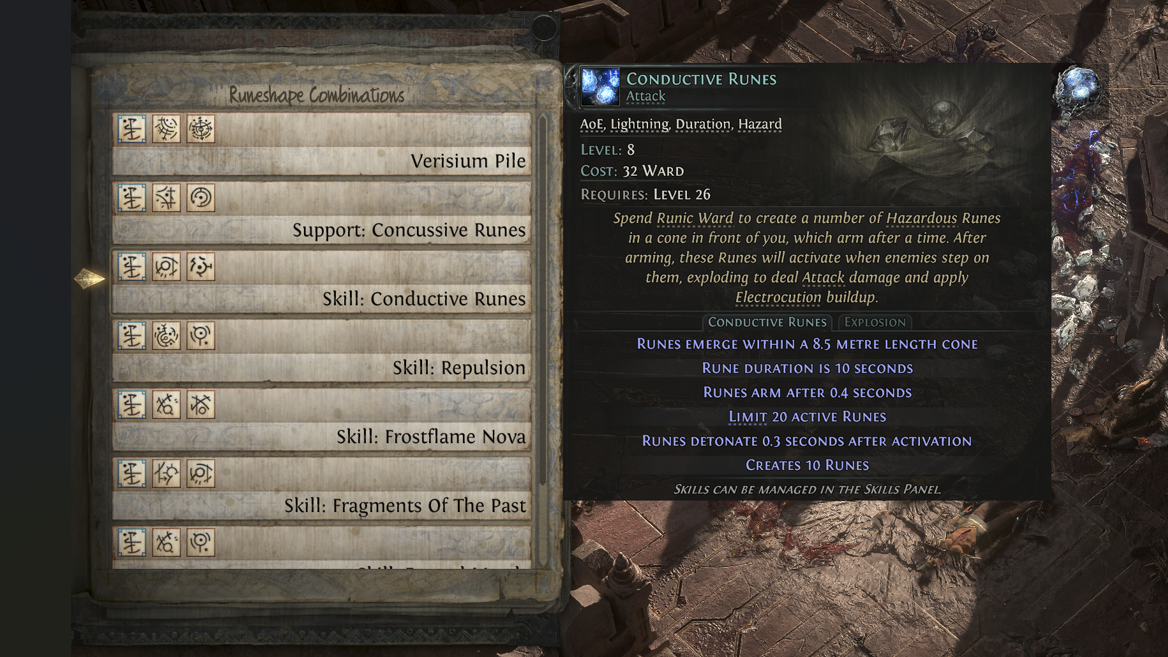
Path of Exile Reddit has dissected the new Runic Skills system since Patch 0.5. This guide pulls together the community's best tips, proven Kalguuran builds, and troubleshooting advice for Ward optimization and Runic skill mechanics.