
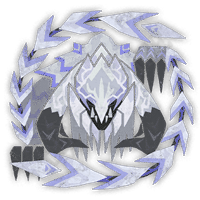
Guardian Arkveld
Large Monster
An artificial species created by an ancient civilization and imbued with the power of a monster called Arkveld. It cannot reproduce and does not require food, relying instead on Wyvern Milk for energy. In addition to absorbing and discharging energy the way other Guardians do, Guardian Arkveld can also absorb elemental energy through the chainblades on its wings and use it for sustenance.
Guide and Information
An artificial species created by an ancient civilization and imbued with the power of a monster called Arkveld. It cannot reproduce and does not require food, relying instead on Wyvern Milk for energy. In addition to absorbing and discharging energy the way other Guardians do, Guardian Arkveld can also absorb elemental energy through the chainblades on its wings and use it for sustenance.
Drops
Guardian Scale
Rarity: 4
Drop Rate: Target: 20% Capture: 100% Break: 50% Carve: 45%
Guardian Pelt
Rarity: 4
Drop Rate: Target: 20% Capture: 100%(Left Chainblade)100%(Right Chainblade) Break: 30% Carve: 43%
Guardian Blood
Rarity: 3
Drop Rate: Target: 10% Break: 20%100%(Tail) Carve: 12%
Nourishing Extract
Rarity: 3
Drop Rate: Target: 30%
Tough Guardian Bone
Rarity: 2
Drop Rate: Target: 20%
Attacks
Aerial Dive Maneuver -
While on the ground, the Arkveld will quickly gain altitude by flapping its wings and jumping. Once it's airborne, it will dive to drag both Chainblades onto the ground and flip in the air just before it lands back on the ground.
Arm Spin Maneuver -
The Guardian Arkveld will stand on all 4 legs as it whips the right chainblade. As it lowers its body, it will prepare to spin by jumping and then hitting the ground with its wing/chainblade. It will use the momentum to land on its original orientation.
Arm Sweep
- The Guardian Arkveld will raise its right arm in front of it. After a quick pause, it will strike the ground using the tip of its wings, then pull it back while dragging the Chainblades on its side.
Arm Swipe -
While on all fours and being attacked by Hunters on its right side, the Guardian Arkveld will shift its weight to the left and raise its right arm. Once the arm peaks, it will strike the ground and swipe it towards the Hunters.
Arm Strike to Red Lightning Blasts
- While on all fours, the Guardian Arkveld will whip its right chainblades around, and then strike the ground in front of it. The Guardian Arkveld will pull back its body and raise its right arm to whip the Chainblades in front of it. The Red Lightning will travel from its body and into the ground, which will cause a blast that travels after a few seconds. Hunters can get blown away when hit directly.
Arm Strike to Sweep
- The Guardian Arkveld will pull back its body and raise its right arm to whip the Chainblades in front of it. Once the Chainblade latches to the ground, it will sweep it across and pull it back towards its body.
Chainblade Chain Attack
- The Guardian Arkveld will release a chain attack of 2 Right Chainblades, and 1 Left Chainblade. It will start with the Arkveld stepping forward and then releasing the right Chainblades on its sides while glowing. After a quick pause, it will fully extend the Chainblade as it slams it on the ground in front of it, leaving red lightning marks on the ground. Upon retracting the chainblade, it will cause explosions on the ground. Then, it will follow up with another Chainblade on the same side (Right) doing the same thing before switching to the Left Chainblade. So the sequence is: Right, Right, and Left. Note: The Chainblades on each side do not hit at the same time. There's a slight delay before the second Chainblade hits the ground. The Guardian Arkveld will usually follow up with a Red Lightning Blasts.
Chainblade Maneuver
- The Guardian Arkveld will let out a roar as it jumps up and flap its wings. As soon as it's airborne, the Guardian Arkveld will extend its left chainblade and latch onto the ground. Using the latched chainblade, it will pull its body forward as it twists while diving to face the direction where it came from.
Chainblade Somersault
- The Guardian Arkveld's body will let out a roar as its body will glow white. After a while, the color will turn red, and it will strike both Chainblades in front of it to push itself backward. As the Arkveld flies backward, the Chainblades will latch onto the ground and it will use it to push itself forward into a Somersault. Upon landing, it will quickly turn around by slamming the Chainblades on its sides. From here, it will follow up with a Chainblade Strike in front of it.
Chainblade Strike
- The Guardian Arkveld will quickly take a step back and pull its left arm on its side. Then, it will strike the left-side Chainblades in front, leaving red lightning marks around it. As the Guardian Arkveld retracts the Chainblade, the red lightning will explode. The Chainblades on each side do not hit at the same time. There's a slight delay before the second Chainblade hits the ground. (There's a variation of this move without the red lightning marks).
Charge -
The Guardian Arkveld will let out a roar as a white veil starts to cover its body. The monster will pull back its body with its left arm above its body, and the right arm crossed in front of its chest. After the roar, it will start charging forward, lowering its right arm on the ground and dragging it forward. Upon reaching its target, it will swing its arm upwards.
Charged Chainblade Sweep
- While facing its sides, the Guardian Arkveld will let out a high-pitched sound as it swings its its right chainblade to cover its body and face. After the high-pitched sound, it will sweep the chainblade away from its body, reaching a large AoE in front of it.
Dash and Twist
- The Guardian Arkveld will let out a high-pitched sound as its body starts to shake. After a quick pause, it will start dashing in one direction and as it steps its right leg, it will raise its right arm and twist it. The force of this movement will cause the Guardian Arkveld to spin and face its original position.
Dash to Arm Swing
- The Guardian Arkveld will pull back its body as it whips around its right wing & chainblade. Once the wing lands on the ground, it will dash forward, and as it steps its right wing, it will raise its right arm and swing it around. This move can blow away hunters when hit directly.
Double Chainblade Attack
- If hunters are far from the Guardian Arkveld, it will launch a range attack. It starts with the monster letting out a high-pitched sound, stepping backward, and then it will pull back both arms on its sides. After a quick pause, it will swing both wings forward and the Chainblades will slam onto the ground. It will stay in the same position for about 1.5 seconds before it retracts its Chainblades.
GrabGrab
Grab - When a hunter falls on the ground, the Guardian Arkveld will let out a low growling sound. It will pull back its right arm behind its body as it retracts all four chainblades. It will then jump, and use the Chainblade to attack the fallen hunter, and then grab the hunter with one of its free Chainblades. The Hunter needs to attack fiercely to get out of the Grab.
Jump Blast
- The Guardian Arkveld will let out a high-pitched sound while pulling back its body. The right arm is above its body, while the left arm is crossed in front of its chest. After the high-pitched sound, the Guardian Arkveld will jump forward and swipe its right arm onto the ground and cause an explosion (if the ground is made of Wylkrystals).
Jump Maneuver
- While on the ground, the Guardian Arkveld will quickly jump and use one of its Chainblades to grab onto the ground to reposition itself.
Jump to Arm Strike -
While on all fours, the Arkveld will quickly turn and its body will start glowing white. As it lets out a high-pitched sound, it will pull back its right arm above its head, and then jump forward to strike the ground. (There's a variation of this move where the Guardian Arkveld will strike the ground that leaves it with Red Lightning Blasts)
Ram
- When a hunter is directly in front of The Guardian Arkveld, it will quickly pull back its face, and then ram it downwards against a target. It can repeat this move up to 2 times.
Red Lightning Blasts
- The Arkveld's body will glow white and will let out a roar as it stands up on its hind legs. Once stood, the Arkveld's body will be covered by red lightning, and it will cross its Chainblades focusing all 4 in front of it, causing an explosion. Soon after, it will twist its body to jump, and upon landing, it will unleash Red Lightning Blasts in a large AoE directly in front of it. This deals a large amount of damage and can blow away hunters when hit directly.
Roar
- The Guardian Arkveld can let out a roar that interrupts current actions.
Tail Slam and Spin
- The Guardian Arkveld will turn to the side and face the targets on the right while it pulls back its tail. It will flick its tail against the ground, and then quickly swing it across in an upward manner. The monster will use the force to spin its whole body at a 90-degree angle, which causes the monster to face the other side. The Guardian Arkveld can also do the same move while facing the other side.
Tail Strike
- While facing the targets, the Guardian Arkveld will quickly spin to face away from them. It will reposition its head on the side to look at the targets, then the Guardian Arkveld will slightly raise its tail above its body right before it extends it to strike the ground near its targets. The tail will get stuck in this position for about 2 seconds.
Tail Thrust
- While facing away from its targets, the Arkveld will slightly raise its tail above its body right before it extends it to thrust directly behind it. It can do this move with very little to no warning, and the Guardian Arkveld's head is difficult to see due to the size of the monster. Hunters attacking from behind need to pay attention to the tail movements.
Tail Upswing
- The Arkveld will turn to the side and face the targets on the right while it pulls back its tail. After the recoil, it will swing the tail in an upward manner and use the force to spin its whole body at a 90-degree angle, which causes the monster to face the other side.
Whipped Chainblade
- While on all fours, the Guardian Arkveld will pull back its right wing behind its head. After a quick pause, it will whip its arm forward and the Chainblade slams onto the ground. As it pulls back the right Chainblade, it will extend the other Chainblade to also whip it towards the ground.
Weapons
- Dosha Fearbringer II
- G Veldian Arcum I
- Hunter's Bow III
- Bone Strongarm III
- G Veldian Labrys I
- Bone Hatchets III
- Dosha Fastflayers II
- G Veldian Harpes I
- Bone Blade III
- Dosha Fellslayer II
- G Veldian Gladius I
- Bone Gunlance III
- G Veldian Hasta I
- Bone Bludgeon III
- G Veldian Malleus I
- Bone Shooter III
- G Veldian Tormentum I
- Bone Horn III
- Dosha Farsounder II
- G Veldian Sibilus I
- Bone Staff III
- G Veldian Trudis I
- Bone Lance III
- Dosha Fierceborer II
- G Veldian Lancea I
- Dosha Faithbreaker II
- G Veldian Impetum I
- Hunter's Rifle III
- Bone Shotel III
- Dosha Fatecleaver II
- G Veldian Ensis I
- Bone Axe III
- Dosha Fleshhacker II
- G Veldian Securis I
- Bone Kukri III
- G Veldian Mucro I
- Albirath Bow II
- Dosha Griefbringer II
- G Veldian Arcum II
- Albirath Blade II
- Chthonian Flame II
- G Veldian Labrys II
- Chthonian Kusarigamas II
- Dosha Guardflayers II
- G Veldian Harpes II
- Guild Knight Sabers II
- Twin Albiraths II
- Albirath Wing II
- Dosha Grimslayer II
- G Veldian Gladius II
- Albirath Rook II
- G Veldian Hasta II
- Albirath Bludgeon II
- G Veldian Malleus II
- G Veldian Tormentum II
- Albirath Feroce II
- Dosha Grudgesounder II
- G Veldian Sibilus II
- Chthonian Vajra II
- G Veldian Trudis II
- Guardian Rathmaul II
- Albirath Tail II
- Chthonian Firewheel II
- Dosha Gloomborer II
- G Veldian Lancea II
- Chthonian Gunfire II
- Dosha Gigasbreaker II
- G Rathling Gun II
- G Veldian Impetum II
- Dosha Gravecleaver II
- G Veldian Ensis II
- Wyvern Blade Ash II
- Albirath Flamesplitter II
- Dosha Gorehacker II
- G Veldian Securis II
- Albirath Edge II
- G Veldian Mucro II
- Griefbringer Urstox
- Solar Spicule
- Bequeathed Enmity
- Guardian Albathos
- Bequeathed Oblivion
- Guardflayers Urbastra
- Wyvern Sentinels
- Grimslayer Urgeom
- Whitefire Rathguard
- Shining Rook
- Gibil Hammer
- G Rathalos Feroce
- Grudgesounder Urga
- Alabaster Rathmaul
- Bequeathed Testament
- Bequeathed Regret
- Gloomborer Urshanith
- Shining Pillar
- Bequeathed Animus
- Gigasbreaker Urbolkule
- White Rathling Phoenix
- Gravecleaver Urkemush
- Wyvern Blade Lily
- Albirath Blaze Splitter
- Gorehacker Urgahaac
- Melting Point
Armors
- Guardian Arkveld Set
- Guardian Doshaguma Set
- Guardian Rathalos Set
- Guardian Seikret Set
- Nu Udra Set
- Rey Dau Set
- Uth Duna Set
- Xu Wu Set
- Bone Alpha Set
- Chainmail Alpha Set
- Leather Alpha Set
- Artian Alpha Set
- Guardian Doshaguma Alpha Set
- Guardian Doshaguma Beta Set
- Guardian Ebony Alpha Set
- Guardian Ebony Beta Set
- Guardian Fulgur Alpha Set
- Guardian Fulgur Beta Set
- Guardian Rathalos Alpha Set
- Guardian Rathalos Beta Set
- Guardian Seikret Alpha Set
- Guardian Seikret Beta Set
- Damascus Alpha Set
- Dober Alpha Set
- Dragonking Alpha Set
- Guardian Arkveld Alpha Set
- Guardian Arkveld Beta Set
- Guild Ace Alpha Set
Ailments
- Dragonblight
Elements
- Dragon
Habitats
- Ruins of Wyveria
Weaknesses
- Dragon
Gallery