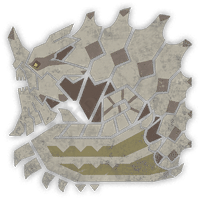
Gravios
Large Monster
Large wyverns found in Oilwell Basin. They have a developed physique, powerful heat rays, and a host of gases they can emit from their body. Their bony carapaces are famously tough but expose a surprisingly brittle interior once destroyed
Guide and Information
Large wyverns found in Oilwell Basin. They have a developed physique, powerful heat rays, and a host of gases they can emit from their body. Their bony carapaces are famously tough but expose a surprisingly brittle interior once destroyed
Drops
Gravios Wing
Rarity: 5
Drop Rate: Target: 20% Capture: 100%(Left Wing)100%(Right Wing) Break: 23%
Gravios Carapace
Rarity: 4
Drop Rate: Target: 20% Capture: 60%(Back)60%(Left Leg)60%(Right Leg) Break: 30%78%(Tail) Carve: 80%
Gravios Skull
Rarity: 4
Drop Rate: Capture: 100%(Head) Break: 13%
Gravios Pleura+
Rarity: 3
Drop Rate: Target: 15% Capture: 100%(Belly) Break: 18%
Firecell Stone
Rarity: 3
Drop Rate: Capture: 40%(Back)40%(Left Leg)40%(Right Leg) Carve: 20%
Gravios Certificate S
Rarity: 1
Drop Rate: Target: 8%
Gravios Medulla
Rarity: 1
Drop Rate: Target: 8% Break: 11%22%(Tail)
Inferno Sac
Rarity: 1
Drop Rate: Target: 13%
Coma Sac
Rarity: 1
Drop Rate: Target: 13%
Wyvern Gem
Rarity: 1
Drop Rate: Target: 3% Break: 5%
Attacks
Body Roll -
The Gravios will put its chest out and pull back both wings on the side. After a quick pause, it will drop its right shoulder on the ground. This causes the Gravios to roll on the ground with its back against the ground and the hunter. It will roll completely until it returns to an upright orientation. It can do this move on either side. This move causes the Gravios to stop moving for about 3 seconds after.
Charge and Slide -
The Gravios will pull back both arms on its sides as it roars. Then, it will charge forward by stepping once on each hind leg, and then attempt to stop by sliding.
Fireball
- While standing on both hindlegs, an orange glow will form inside its mouth. Once fully prepared, it will lower its head and release a Fireball from its mouth. After each fireball, it will raise its upper body, then lower it each time it releases a fireball. It can repeat this move up to 3 times consecutively. This attack can inflict Fireblight.
Flame Ring
- The Gravios will move its tail up and down, then raise both wings (arms) on its side as it pulls back its head. After a quick pause, it will blow a fiery breath while facing the ground, creating a ring of flame underneath it. This move can blow away hunters when hit directly.
Headbutt -
The Gravios will raise both wings above its head as it pulls back its head. After pausing briefly, it will do a headbutt towards a target.
Jump Slam
- The Gravios will flap both wings once, then jump as they flap both wings again. Once it's airborne, it will jump down with all of its weight in the same spot.
Laser Jet
- The Gravios will rise to stand up on its hind legs while raising both arms on the sides above its head. A reddish glow will form in its mouth while it's roaring. After a pause, it will bring down both wings as it releases a fiery laser in front of it. This laser is active for about 2 seconds.
Strong Laser Jet
- This is an alternate version of the Laser Jet but with added movement. It usually starts with a low roar where an orange glow has formed inside its mouth. It will then rise up and raise its head and wings at the same time, and fire off a projectile while it's still facing the ceiling. The Laser Jet will move downwards, then stay for about 1 second while looking at its feet, then swing upwards again.
Strong Roar
- When attacked, this monster will let out a Strong Roar that can immobilize everyone around it.
Tail Whip
- While looking at its sides, it will start to roar, and drag its tail on the ground, and raise it on the other side. Then, it will quickly whip it from left to right, back to the left, and then finish it off by whipping it in a round manner. There's a variation where it will step sideways after it whips the tail.
Weapons
- Arachnoscale II
- Immane Blade II
- Shell Gunberd II
- Cluster Hammer II
- Ner Bustergun II
- Stealth Glaive II
- Blood Cry II
- Scaly Sword II
- Poison Blade II
- Dual Battleaxes II
- Gravios Warmakers I
- Slaughter II
- Hard Hitter II
- White Gunlance I
- Shell Hammer I
- Venom Monster II
- Gravios Howl I
- Tankmage II
- Poisoned Capri II
- Graviafaren I
- Gravios Spear I
- Titan Launcher I
- Gravios Syphos I
- Venom's Pain II
- Kut-Ku Stave II
- Queen Blaster II
- Quematrice Arco IV
- Scylla Fist III
- Veldian Arcum I
- Windbrace Bow III
- Dear Lutemis II
- Veldian Labrys I
- Windthrash Charger III
- Kut-Ku Pair II
- Quematrice Silexes IV
- Veldian Harpes I
- Chicken Decapitator II
- Quematrice Espada IV
- Valkyrie Blade II
- Veldian Gladius I
- Balahara Exploder IV
- Princess Panoply II
- Quematrice Culebrina IV
- Veldian Hasta I
- Balahara Hammer IV
- Kut-Ku Pick II
- Veldian Malleus I
- Queen's Longfire II
- Veldian Tormentum I
- Yian Kut-Ku Cannon II
- Balahara Horn IV
- Kut-Ku's Song II
- Valkyrie Chordmaker II
- Veldian Sibilus I
- Balahara Glaive IV
- Kut-Ku Pike II
- Princess Regalia II
- Veldian Trudis I
- Balahara Lance IV
- Quematrice Lanza IV
- Veldian Lancea I
- Windpierce Lance III
- Kut-Ku Anger II
- Valkyrie Fire II
- Veldian Impetum I
- Windshear Light III
- Quematrice Lima IV
- Veldian Ensis I
- Windclaw Blade III
- Wyvern Blade Verde II
- Beak Axe II
- Dragonmaiden Axe II
- Veldian Securis I
- Windsunder Axe III
- Balahara Blade IV
- Princess Rapier II
- Quematrice Cuchillo IV
- Veldian Mucro I
- True Dragon Perforator
- Regas Hyper
- Rompo Dendrotox
- Dual Cleavers
- Gravios Conquerors
- Ravager Blade
- Triumvirate Edge
- White Cannon
- Graviton Hammer
- Iron Devil
- Rompo Robustox
- Gravios Gigahowl
- Rompo Latrotox
- Steel Assault
- Great Bagpipe
- Chrome Gale
- Gravordius
- Chrome Lance
- Gravios Lance
- Rompo Tetrotox
- High Chain Blitz
- Titan Panzer
- Keen Edge
- Rompo Mytoxin
- Chrome Accelerator
- Smithy's Pride
- Titan's Armament
Armors
- Hirabami Alpha Set
- Hirabami Beta Set
- Kranodath Alpha Set
- Kranodath Beta Set
- Kut-Ku Alpha Set
- Kut-Ku Beta Set
- Nerscylla Alpha Set
- Nerscylla Beta Set
- Artian Alpha Set
- Azuz Alpha Set
- Gravios Alpha Set
- Gravios Beta Set
- Guardian Fulgur Alpha Set
- Guardian Fulgur Beta Set
- Guardian Rathalos Alpha Set
- Guardian Rathalos Beta Set
- Ingot Alpha Set
- Rathalos Alpha Set
- Rathalos Beta Set
- Dahaad Alpha Set
- Dahaad Beta Set
- Damascus Alpha Set
- Dober Alpha Set
- Gore Alpha Set
- Gore Beta Set
- Nu Udra Alpha Set
- Nu Udra Beta Set
- Arkveld Alpha Set
- Arkveld Beta Set
- Dragonking Alpha Set
Ailments
- Fireblight
Elements
- Fire
Habitats
- Oilwell Basin
- Ruins of Wyveria
Weaknesses
- Water
- Ice
- Dragon
Gallery