
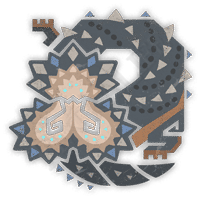
Balahara
Large Monster
Desert-dwelling leviathans that build carapaces out of the fulgurite formed by lightning strikes. They use their flexible skeletons and serpentine bodies to create quicksand traps for unwary prey. Inside their mouths are multiple eye-like sensory organs. The mucus they secrete contains luminous bacteria and is believed to aid visibility while they are submerged and other low-light conditions like sandstorms.
Guide and Information
Desert-dwelling leviathans that build carapaces out of the fulgurite formed by lightning strikes. They use their flexible skeletons and serpentine bodies to create quicksand traps for unwary prey. Inside their mouths are multiple eye-like sensory organs. The mucus they secrete contains luminous bacteria and is believed to aid visibility while they are submerged and other low-light conditions like sandstorms.
Drops
Balahara Scale+
Rarity: 3
Drop Rate: Target: 20% Break: 30% Carve: 48%
Balahara Carapace
Rarity: 3
Drop Rate: Target: 20% Break: 23% Carve: 47%
Balahara Skull+
Rarity: 3
Drop Rate: Target: 13% Capture: 80%(Head) Break: 17%
Balahara Tail
Rarity: 3
Drop Rate: Target: 7% Break: 11%93%(Tail)
Torrent Sac
Rarity: 2
Drop Rate: Target: 18%
Balahara Certificate S
Rarity: 1
Drop Rate: Target: 8%
Balahara Black Pearl
Rarity: 1
Drop Rate: Target: 11% Capture: 20%(Head) Break: 14% Carve: 5%
Wyvern Gem
Rarity: 1
Drop Rate: Target: 3% Break: 5%7%(Tail)
Balahara Scale
Rarity: 3
Drop Rate: Target: 20% Break: 33% Carve: 48%
Balahara Shell
Rarity: 3
Drop Rate: Target: 20% Break: 25% Carve: 47%
Balahara Skull
Rarity: 3
Drop Rate: Target: 15% Capture: 80%(Head) Break: 18%
Balahara Tail
Rarity: 3
Drop Rate: Target: 11% Break: 100%(Tail)
Aqua Sac
Rarity: 2
Drop Rate: Target: 18%
Balahara Certificate
Rarity: 1
Drop Rate: Target: 8%
Balahara Black Pearl
Rarity: 1
Drop Rate: Target: 8% Capture: 20%(Head) Break: 11% Carve: 5%
Attacks
Tail Thrust
- The Balahara can do a thrusting attack with its tail to aim the units on its back or sides.
Tail Sweep
- After tucking the tail for a few seconds, the Balahara will sweep it across the ground behind it to attack nearby targets.
Tail Charge
- The Balahara clutches its tail close to its body for a few seconds, after a while, it will charge forward with the tail leading the attack as it spins.
Face Slam
- The Balahara charges for a brief moment with its mouth wide open, and then slams the ground with its face.
Bite Attack
- The Balahara opens its mouth, pauses briefly, and then rushes forward to bite the target in front of it.
Spit Attack
- The Balahara unleashes a powerful spit that can inflict Waterblight on units that it hits. Hunters may get blown away when hit directly. It can perform this move up to 3 times consecutively.
Charged Swipe
- The Balahara backs away and raises one of its forelegs. After a brief pause, it will swipe its foreleg to attack the target in front of it.
Dig
- The Balahara can dig underground to move between areas quickly.
Dive Attack
- When the Balahara finds a climbable area, it will go to the highest part to do some Spit Attack at first. After a while, it will do a Dive Attack with its mouth wide open.
Weapons
- Balahara Exploder I
- Balahara Hammer I
- Balahara Horn I
- Balahara Glaive I
- Balahara Lance I
- Balahara Blade I
- Guild Knight Sabers I
- Balahara Exploder II
- Balahara Hammer II
- Balahara Horn II
- Balahara Glaive II
- Balahara Lance II
- Balahara Blade II
- Uth Khviluk II
- Uth Ngarpatu II
- Balahara Exploder III
- Uth Falarmata II
- Balahara Hammer III
- Uth Dalgap II
- Balahara Horn III
- Balahara Glaive III
- Balahara Lance III
- Uth Khlunda II
- Uth Olacha II
- Balahara Blade III
- Guild Knight Sabers II
- Queen Blaster II
- Quematrice Arco IV
- Veldian Arcum I
- Windbrace Bow III
- Dear Lutemis II
- Uth Valeroje III
- Veldian Labrys I
- Windthrash Charger III
- Quematrice Silexes IV
- Veldian Harpes I
- Quematrice Espada IV
- Valkyrie Blade II
- Veldian Gladius I
- Balahara Exploder IV
- Princess Panoply II
- Quematrice Culebrina IV
- Veldian Hasta I
- Balahara Hammer IV
- Veldian Malleus I
- Queen's Longfire II
- Veldian Tormentum I
- Balahara Horn IV
- Valkyrie Chordmaker II
- Veldian Sibilus I
- Balahara Glaive IV
- Princess Regalia II
- Veldian Trudis I
- Balahara Lance IV
- Quematrice Lanza IV
- Veldian Lancea I
- Windpierce Lance III
- Valkyrie Fire II
- Veldian Impetum I
- Windshear Light III
- Quematrice Lima IV
- Veldian Ensis I
- Windclaw Blade III
- Wyvern Blade Verde II
- Dragonmaiden Axe II
- Veldian Securis I
- Windsunder Axe III
- Balahara Blade IV
- Princess Rapier II
- Quematrice Cuchillo IV
- Veldian Mucro I
- True Dragon Perforator
- Regas Hyper
- Rompo Dendrotox
- Dual Cleavers
- Gravios Conquerors
- Ravager Blade
- Sandsea Visponan
- Triumvirate Edge
- White Cannon
- Graviton Hammer
- Iron Devil
- Rompo Robustox
- Sandsea Siamitiya
- Gravios Gigahowl
- Rompo Latrotox
- Steel Assault
- Great Bagpipe
- Sandsea Ghantisil
- Chrome Gale
- Gravordius
- Sandsea Uchaltiya
- Chrome Lance
- Gravios Lance
- Rompo Tetrotox
- Sandsea Prallaya
- High Chain Blitz
- Titan Panzer
- Keen Edge
- Rompo Mytoxin
- Chrome Accelerator
- Sandsea Katduva
- Smithy's Pride
- Titan's Armament
Armors
- Balahara Set
- Balahara Alpha Set
- Balahara Beta Set
- Hirabami Alpha Set
- Hirabami Beta Set
- Gravios Alpha Set
- Gravios Beta Set
- Guardian Fulgur Alpha Set
- Guardian Fulgur Beta Set
- Xu Wu Alpha Set
- Xu Wu Beta Set
- Dahaad Alpha Set
- Dahaad Beta Set
- Damascus Alpha Set
- Gore Alpha Set
- Gore Beta Set
- Uth Duna Alpha Set
- Uth Duna Beta Set
- Arkveld Alpha Set
- Arkveld Beta Set
- Dragonking Alpha Set
Ailments
- Waterblight
Elements
- Water
Habitats
- Windward Plains
Weaknesses
- Thunder
Gallery